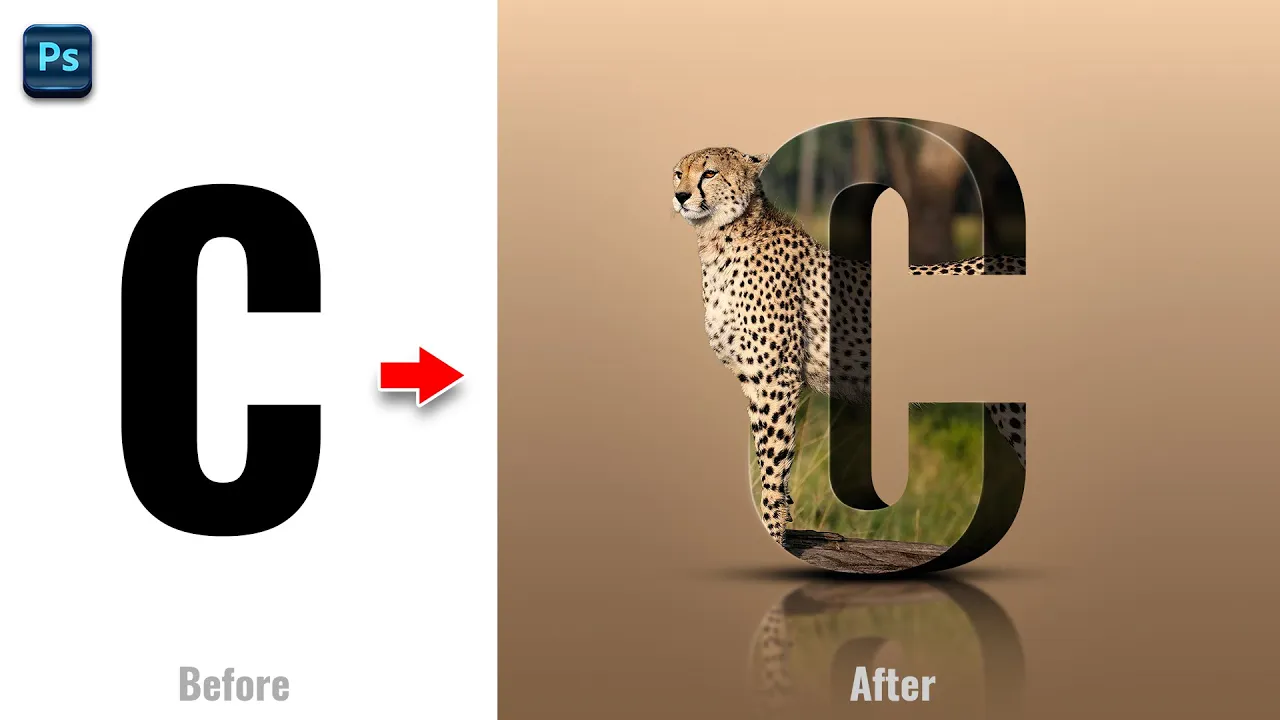
3D text Manipulation in Photoshop | 3D Text effect
Education

3D Text Manipulation in Photoshop | 3D Text Effect
Creating a captivating 3D text effect in Photoshop can significantly enhance your design projects. Here’s a step-by-step guide to achieve this stunning effect:
Step 1: Preparing the Text
- Choose the Text Tool
Select the Text Tool and type your desired text. The font used in this tutorial can be downloaded from the link in the description. - Adjust Text Size
PressCtrl+Tto resize the text to your preference. - Duplicate the Text Layer
PressCtrl+Jto duplicate the text layer.
Step 2: Modify the Text
- Change the Text Color
Select the Move Tool and adjust the color of the duplicated text layer. - Move the Text
Move the text slightly to the right.
Step 3: Creating the 3D Effect
- Using the Pen Tool
Select the Pen Tool and create paths following the process outlined in the tutorial. - Convert to Smart Object
HoldShiftand select the necessary layers, right-click, and choose "Convert to Smart Object." Hide this layer temporarily. - Add an Image
Go to the File menu and select "Place Embedded." Double-click on your image, right-click, and flip it horizontally. Decrease the opacity to see the text layer and adjust the image size. - Reset Opacity
Change the opacity back to 100%.
Step 4: Refining the 3D Text
- Clip Mask the Image
HoldAltand click to create a clip mask to the bottom layer. - Duplicate the Layer
PressCtrl+Jto duplicate the layer. Go to the Select menu, choose "Subject," and click on the Layer Mask icon. - Make Selection Around the Text
HoldCtrland click on the thumbnail of the text layer to make a selection around it. In the Select menu, click on "Inverse." Use the Brush Tool (with black as the foreground color) to delete this area.
Step 5: Adding Finishing Touches
- Unhide Shape Layer
Unhide the shape layer, holdAltand drag the layer to make a copy. Clip mask it to the bottom layer. - Create Levels Adjustments
Create a levels adjustments layer, clip mask it to the bottom layer, and follow the process. - Final Adjustments
Create a new layer, clip mask it to the bottom layer, and refine the effect.
Step 6: Grouping and Finalizing
- Group Layers
Select all layers, pressCtrl+Gto group them, and duplicate the group withCtrl+J. Right-click and choose “Merge Group.” - Flip Vertically
PressCtrl+T, right-click, and select "Flip Vertical" to adjust the position. - Add Gradient
HoldAltand click on the Layer Mask icon, choose the Gradient Tool, and follow the process to create a new layer for final touches.
Step 7: Final Enhancements
- Create Gradient Adjustments Layer
Follow the steps to adjust the gradients as needed. - Merge Layers
PressCtrl+Alt+Shift+Eto make a merged copy of all layers and convert it to a Smart Object. - Apply Camera Raw Filters
Open Camera Raw Filters and apply the necessary settings to achieve the desired effect.
Keywords
- 3D Text Effect
- Photoshop Tutorial
- Text Manipulation
- Pen Tool
- Smart Object
- Clip Mask
- Gradient Tool
- Camera Raw Filters
FAQ
Q1: What is the first step in creating a 3D text effect in Photoshop?
A: The first step is to choose the Text Tool and type your desired text. Then, adjust the text size by pressing Ctrl+T.
Q2: How do I duplicate the text layer?
A: To duplicate the text layer, press Ctrl+J.
Q3: How can I align the image to the text layer?
A: After embedding the image, decrease its opacity to align it properly with the text layer. Once aligned, reset the opacity to 100%.
Q4: What is the purpose of using the Pen Tool?
A: The Pen Tool is used to create paths in the initial phase of forming the 3D effect on the text.
Q5: How do I apply Camera Raw Filters to the final effect?
A: Make a merged copy of all layers using Ctrl+Alt+Shift+E, convert it to a Smart Object, and then open Camera Raw Filters to apply the preferred settings.

