

How To Make Vertical Videos From Horizontal Footage | Generative Fill AI
Film & Animation

How To Make Vertical Videos From Horizontal Footage | Generative Fill AI
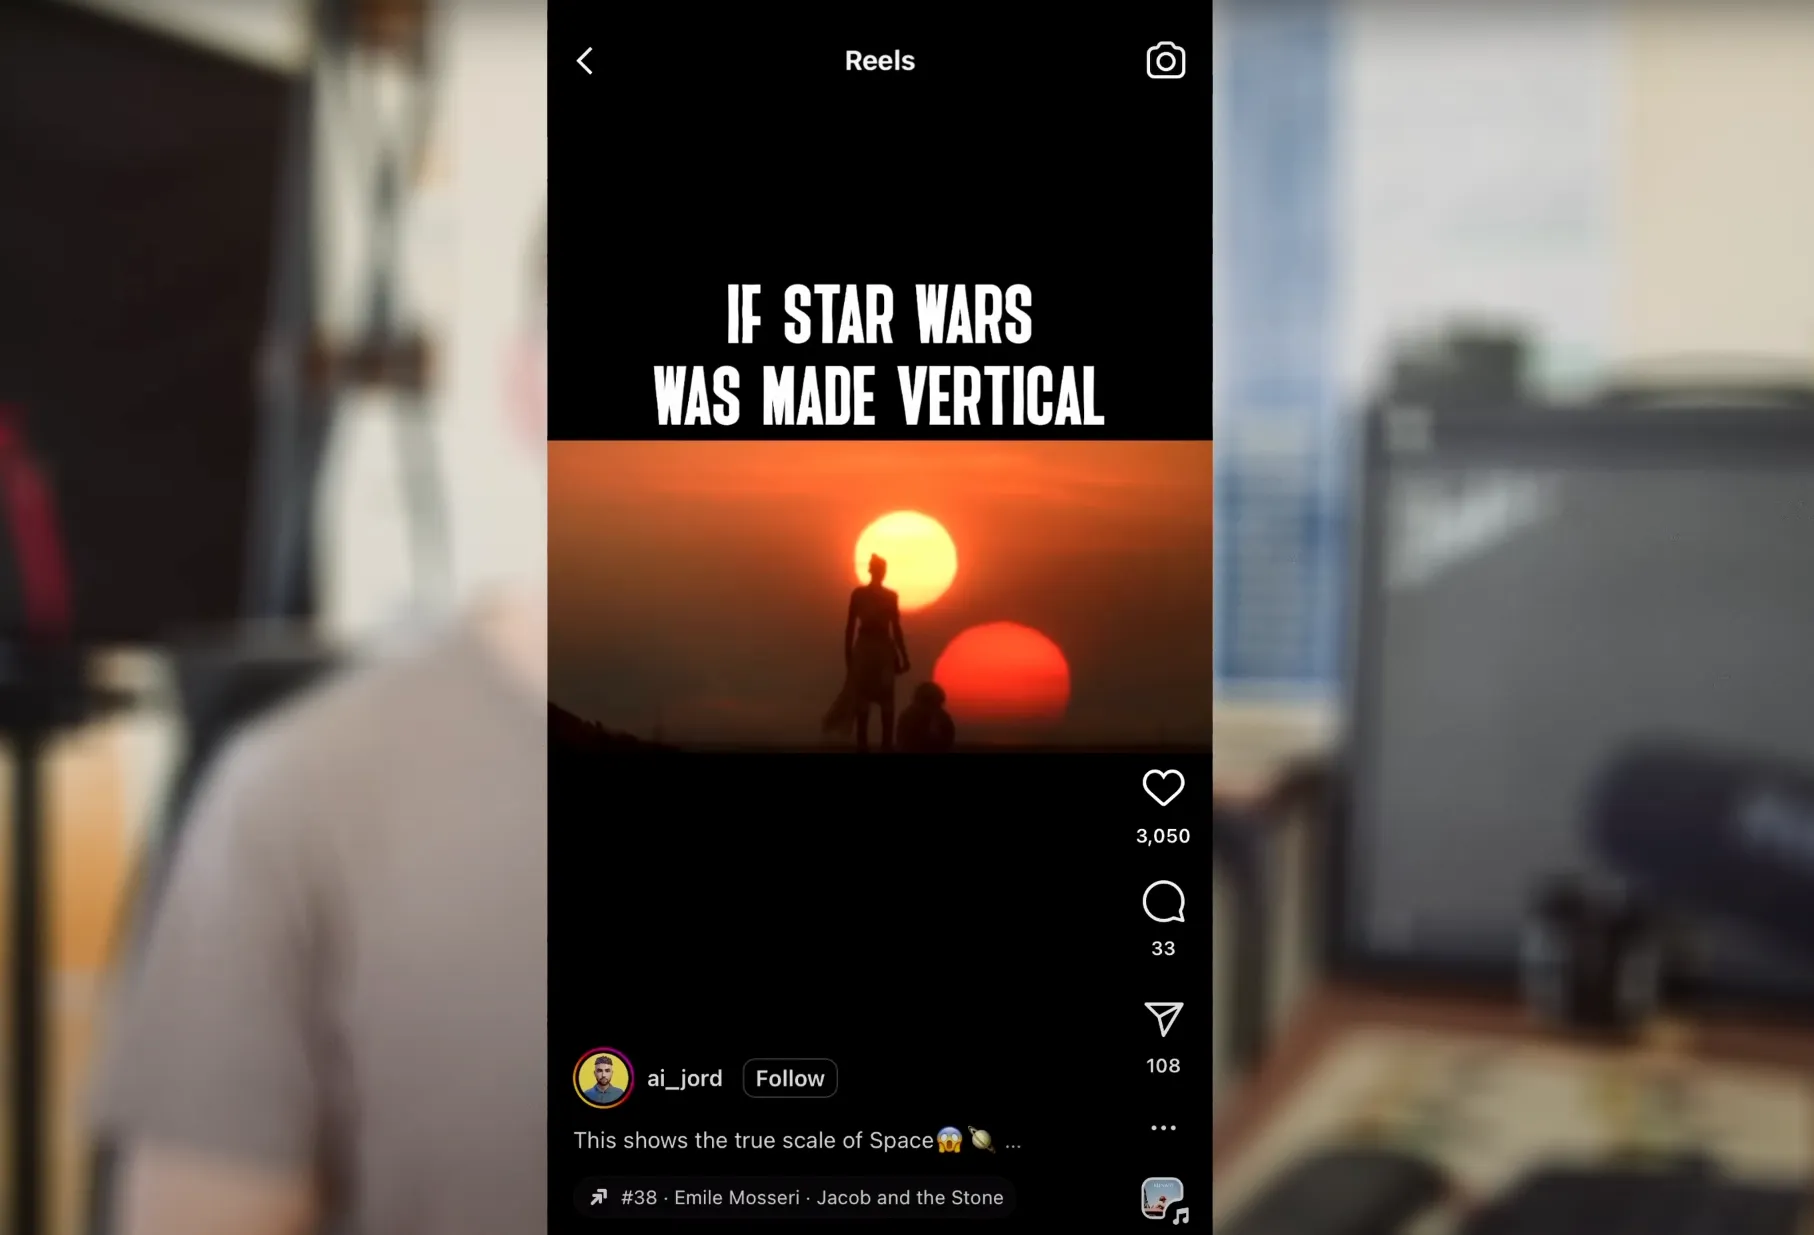
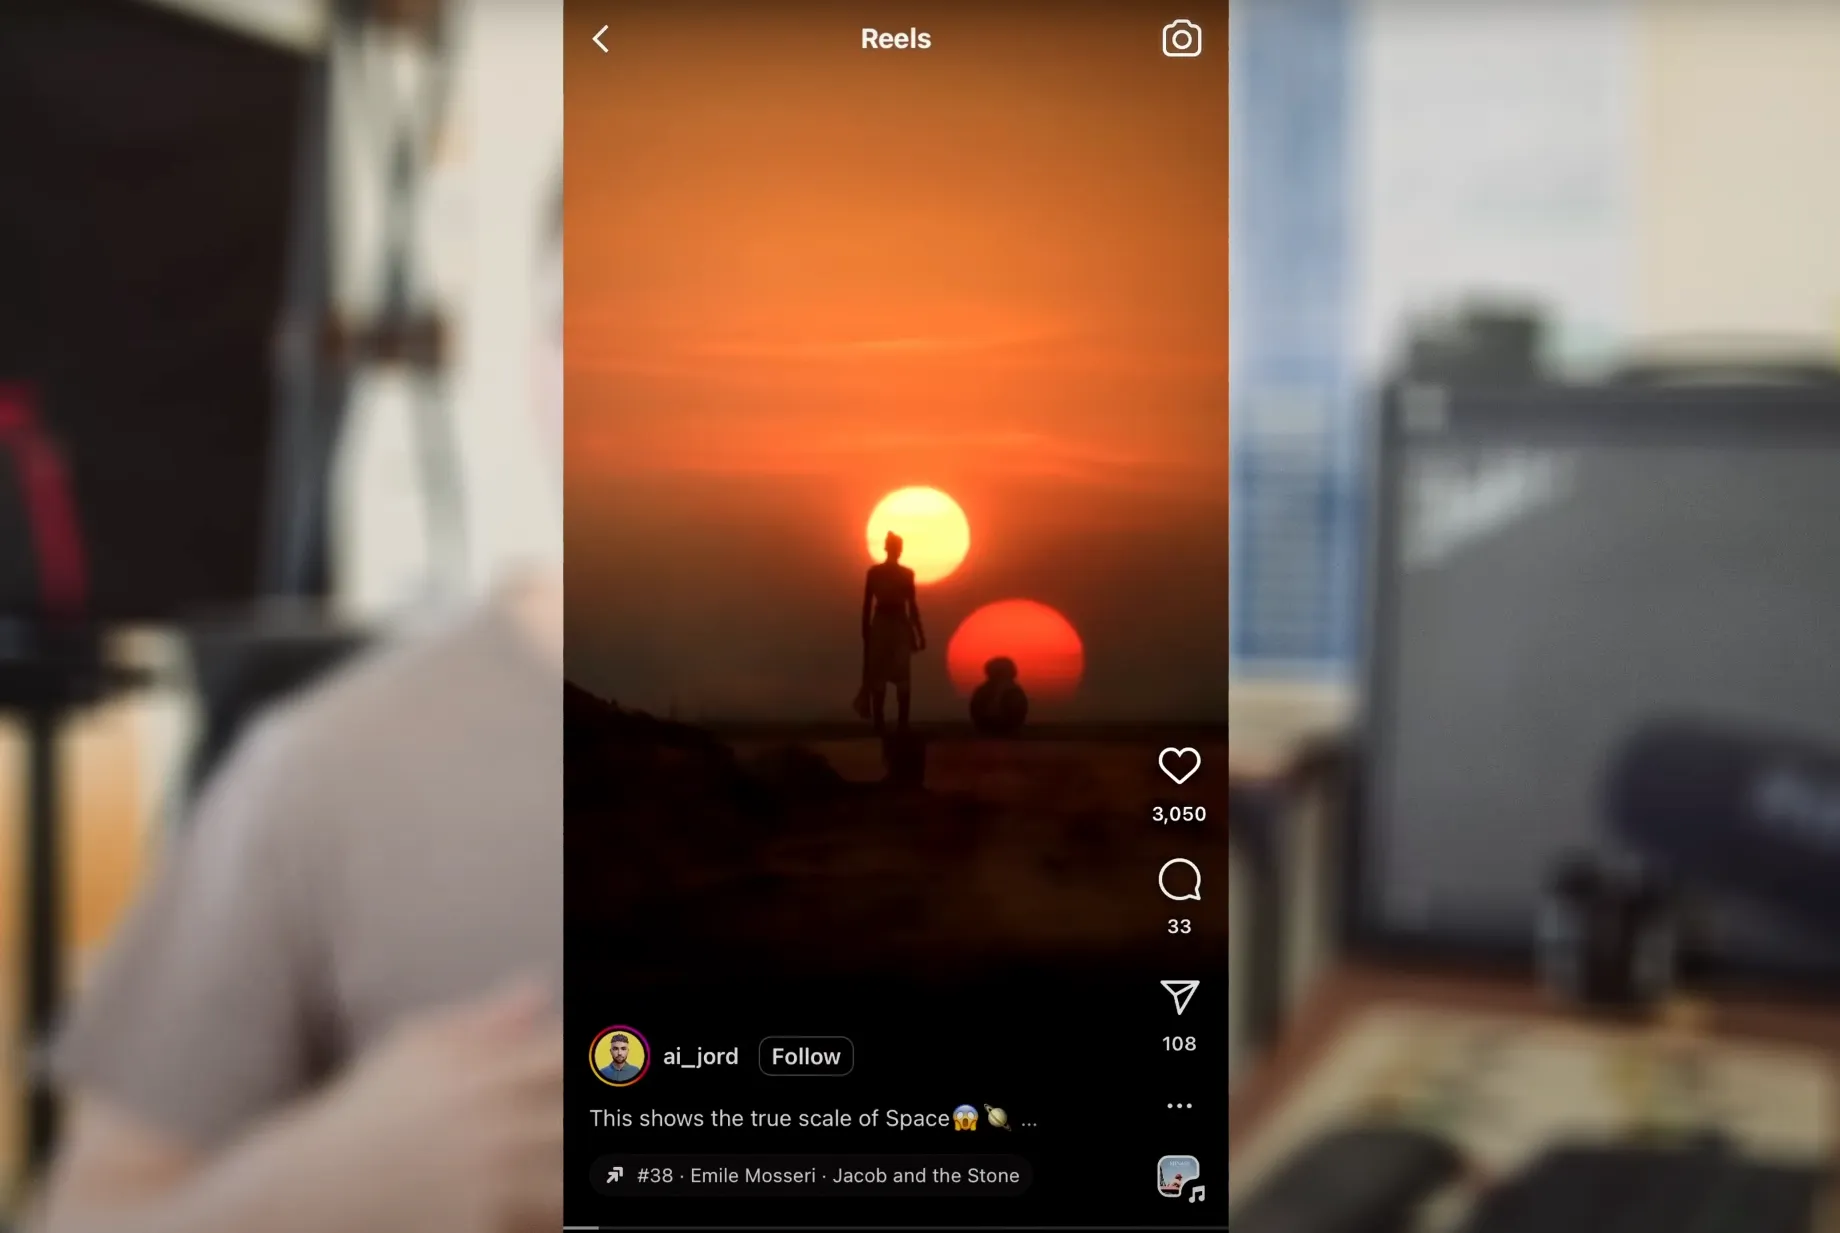
Hey, how you doing, guys? Lewis here with Vivo again, and today we're going to have a look at a new social media AI craze that I can't seem to escape from: Instagram Reels. We're going to run through the process so you know how to do it too. Users are taking a 16x9 film in its original widescreen horizontal format and placing it into a 9x16 vertical social media composition. Instead of resizing the video to fill the entire frame, they leave the bottom and top areas blank and use generative AI to fill these areas.
Thoughts on the Trend
Do I hate this? You know, it's harmless fun. I guess it's not really what the cinematographer had intended, but then again, filmmakers didn't really intend to have their films uploaded on a smartphone where the viewing screen is nothing but a small rectangle. So, I'm not going to go on any sort of AI rant. Instead, we're going to jump into DaVinci Resolve, and I'll walk you through the steps on how to do that.
Step-by-Step Guide
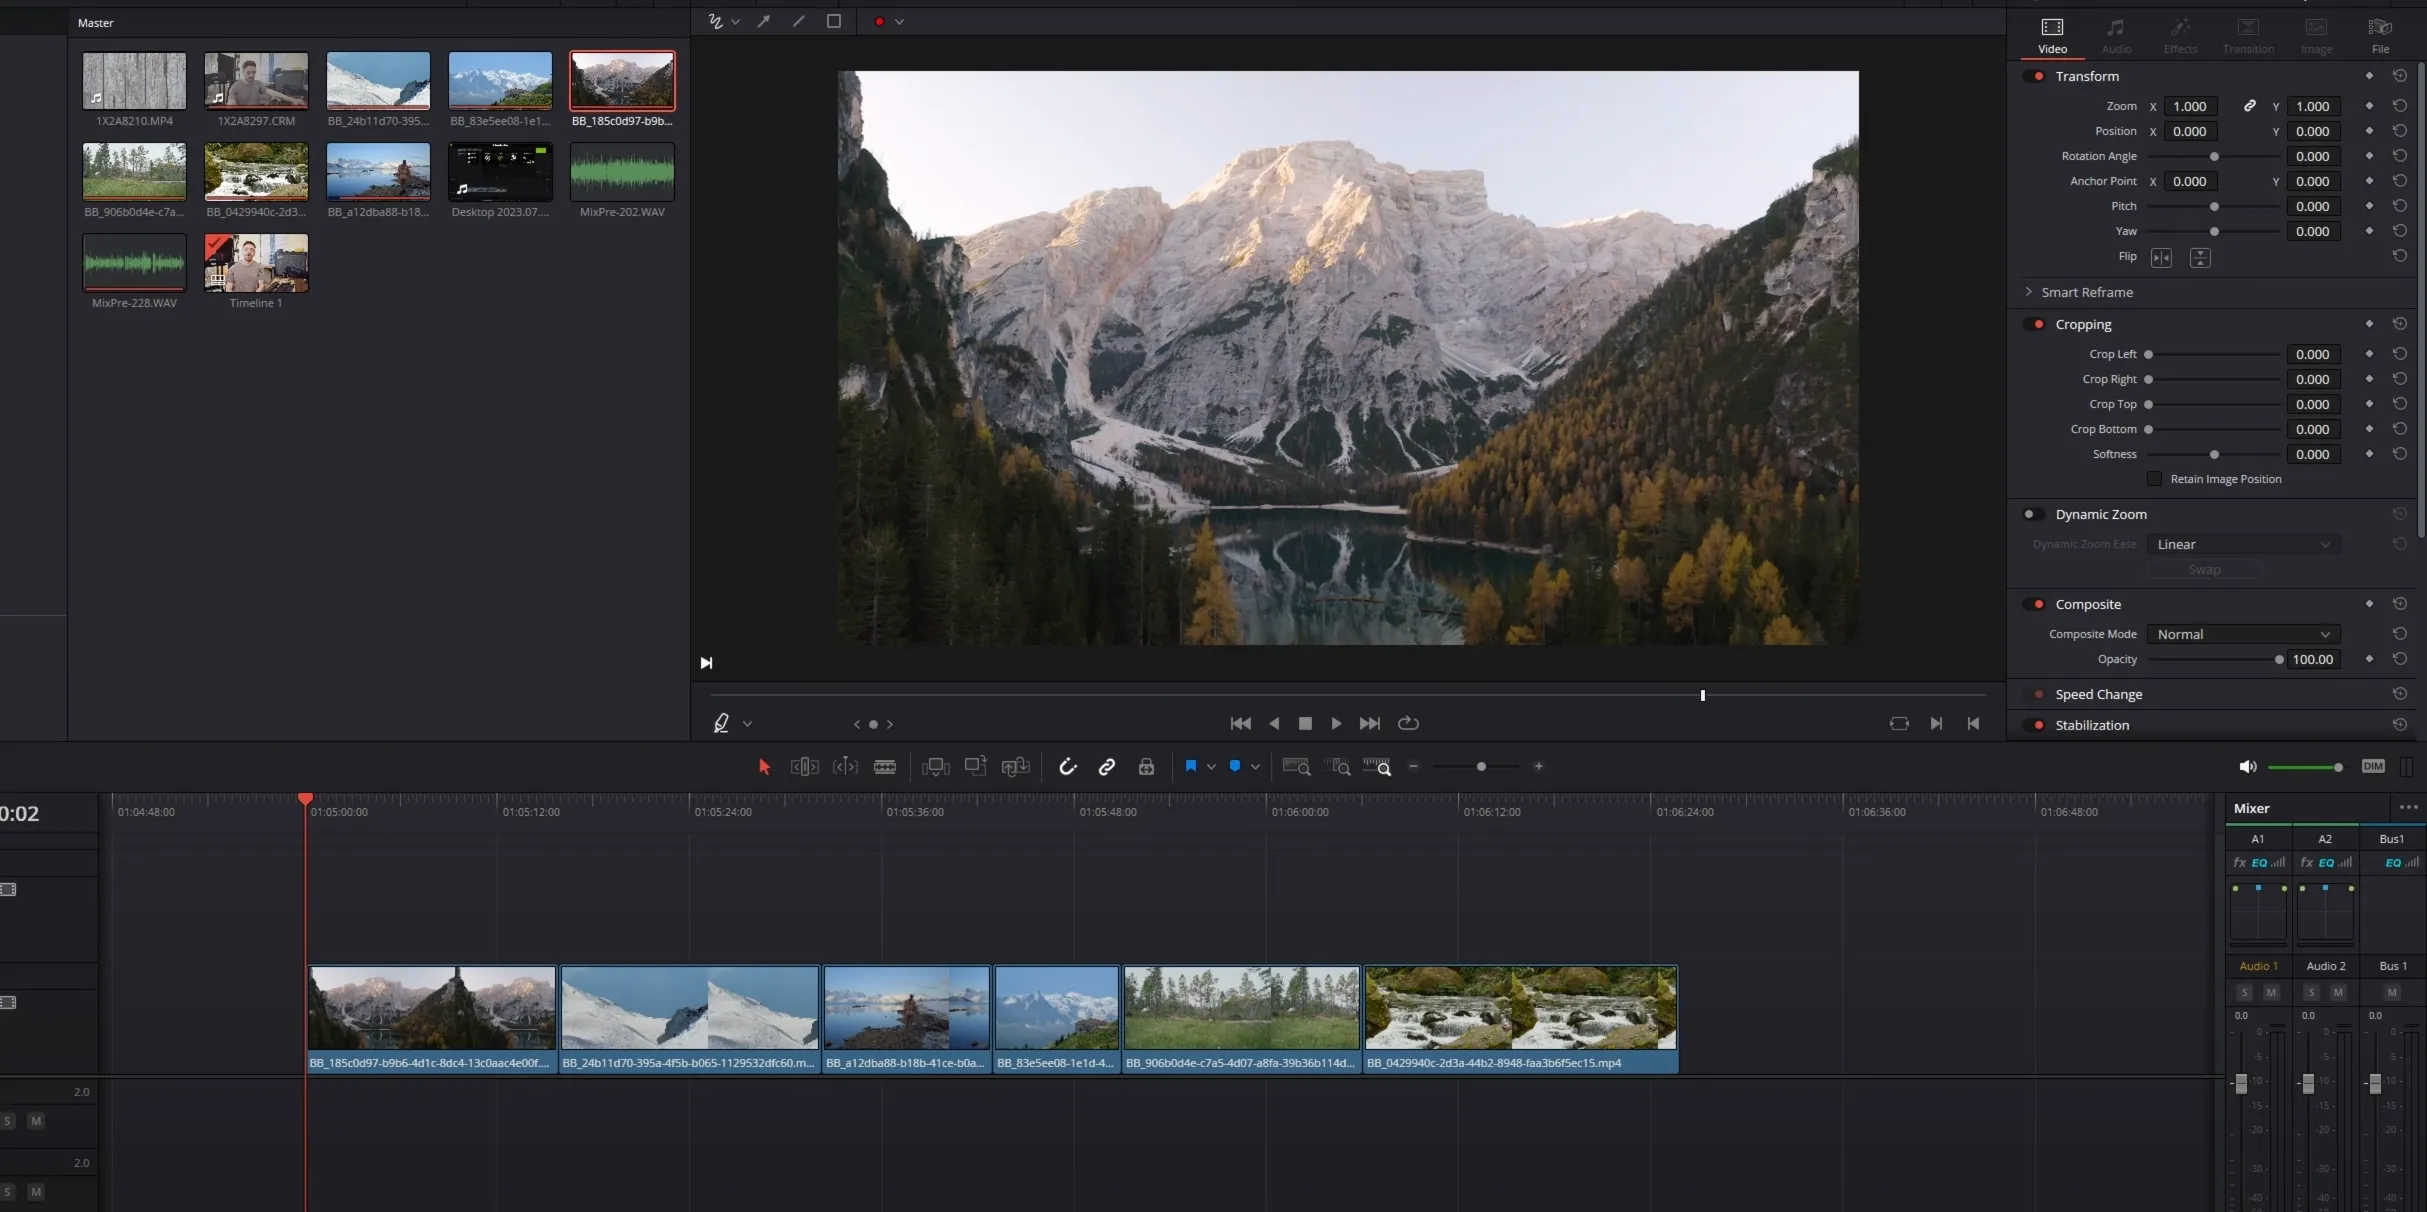
Alright, guys, so I am inside of DaVinci Resolve. It doesn't have to be DaVinci Resolve; it can be Premiere Pro or Final Cut Pro. The NLE does not actually matter. You're going to want to bring all of your video clips in. We're not working from clips from a feature film; these are just fantastic clips from the Fediva library. Although I have tried to keep it in the vein of Lord of the Rings as that was the example I showed you earlier.
Selecting the Right Clips
There are two things that you're going to want to know when selecting the video clips for expanding the vertical properties:
Static Clips: The clip must be static, meaning no camera movement, no tracking, no panning, no tilting, no handheld. It needs to be completely locked off. For example, this completely still shot is great. However, if I scrub through it and see some form of movement, it's not going to be any good.
Frame Movement: While you can have movement within the frame, like a person moving from the lower third to the upper third of the composition, you don't want any movement at the bottom of the frame going out of the composition. The generative fill won't be able to create a generative water in this case, so such clips wouldn't be suitable.
Capturing Screenshots
What you're going to want to do is grab a screenshot of each piece of media you're working with. In DaVinci Resolve, you can grab this still and export it. In Premiere, you have a little camera icon somewhere that you can press to grab a screenshot. Alternatively, you can go full screen and press print screen.
Using Photoshop Beta
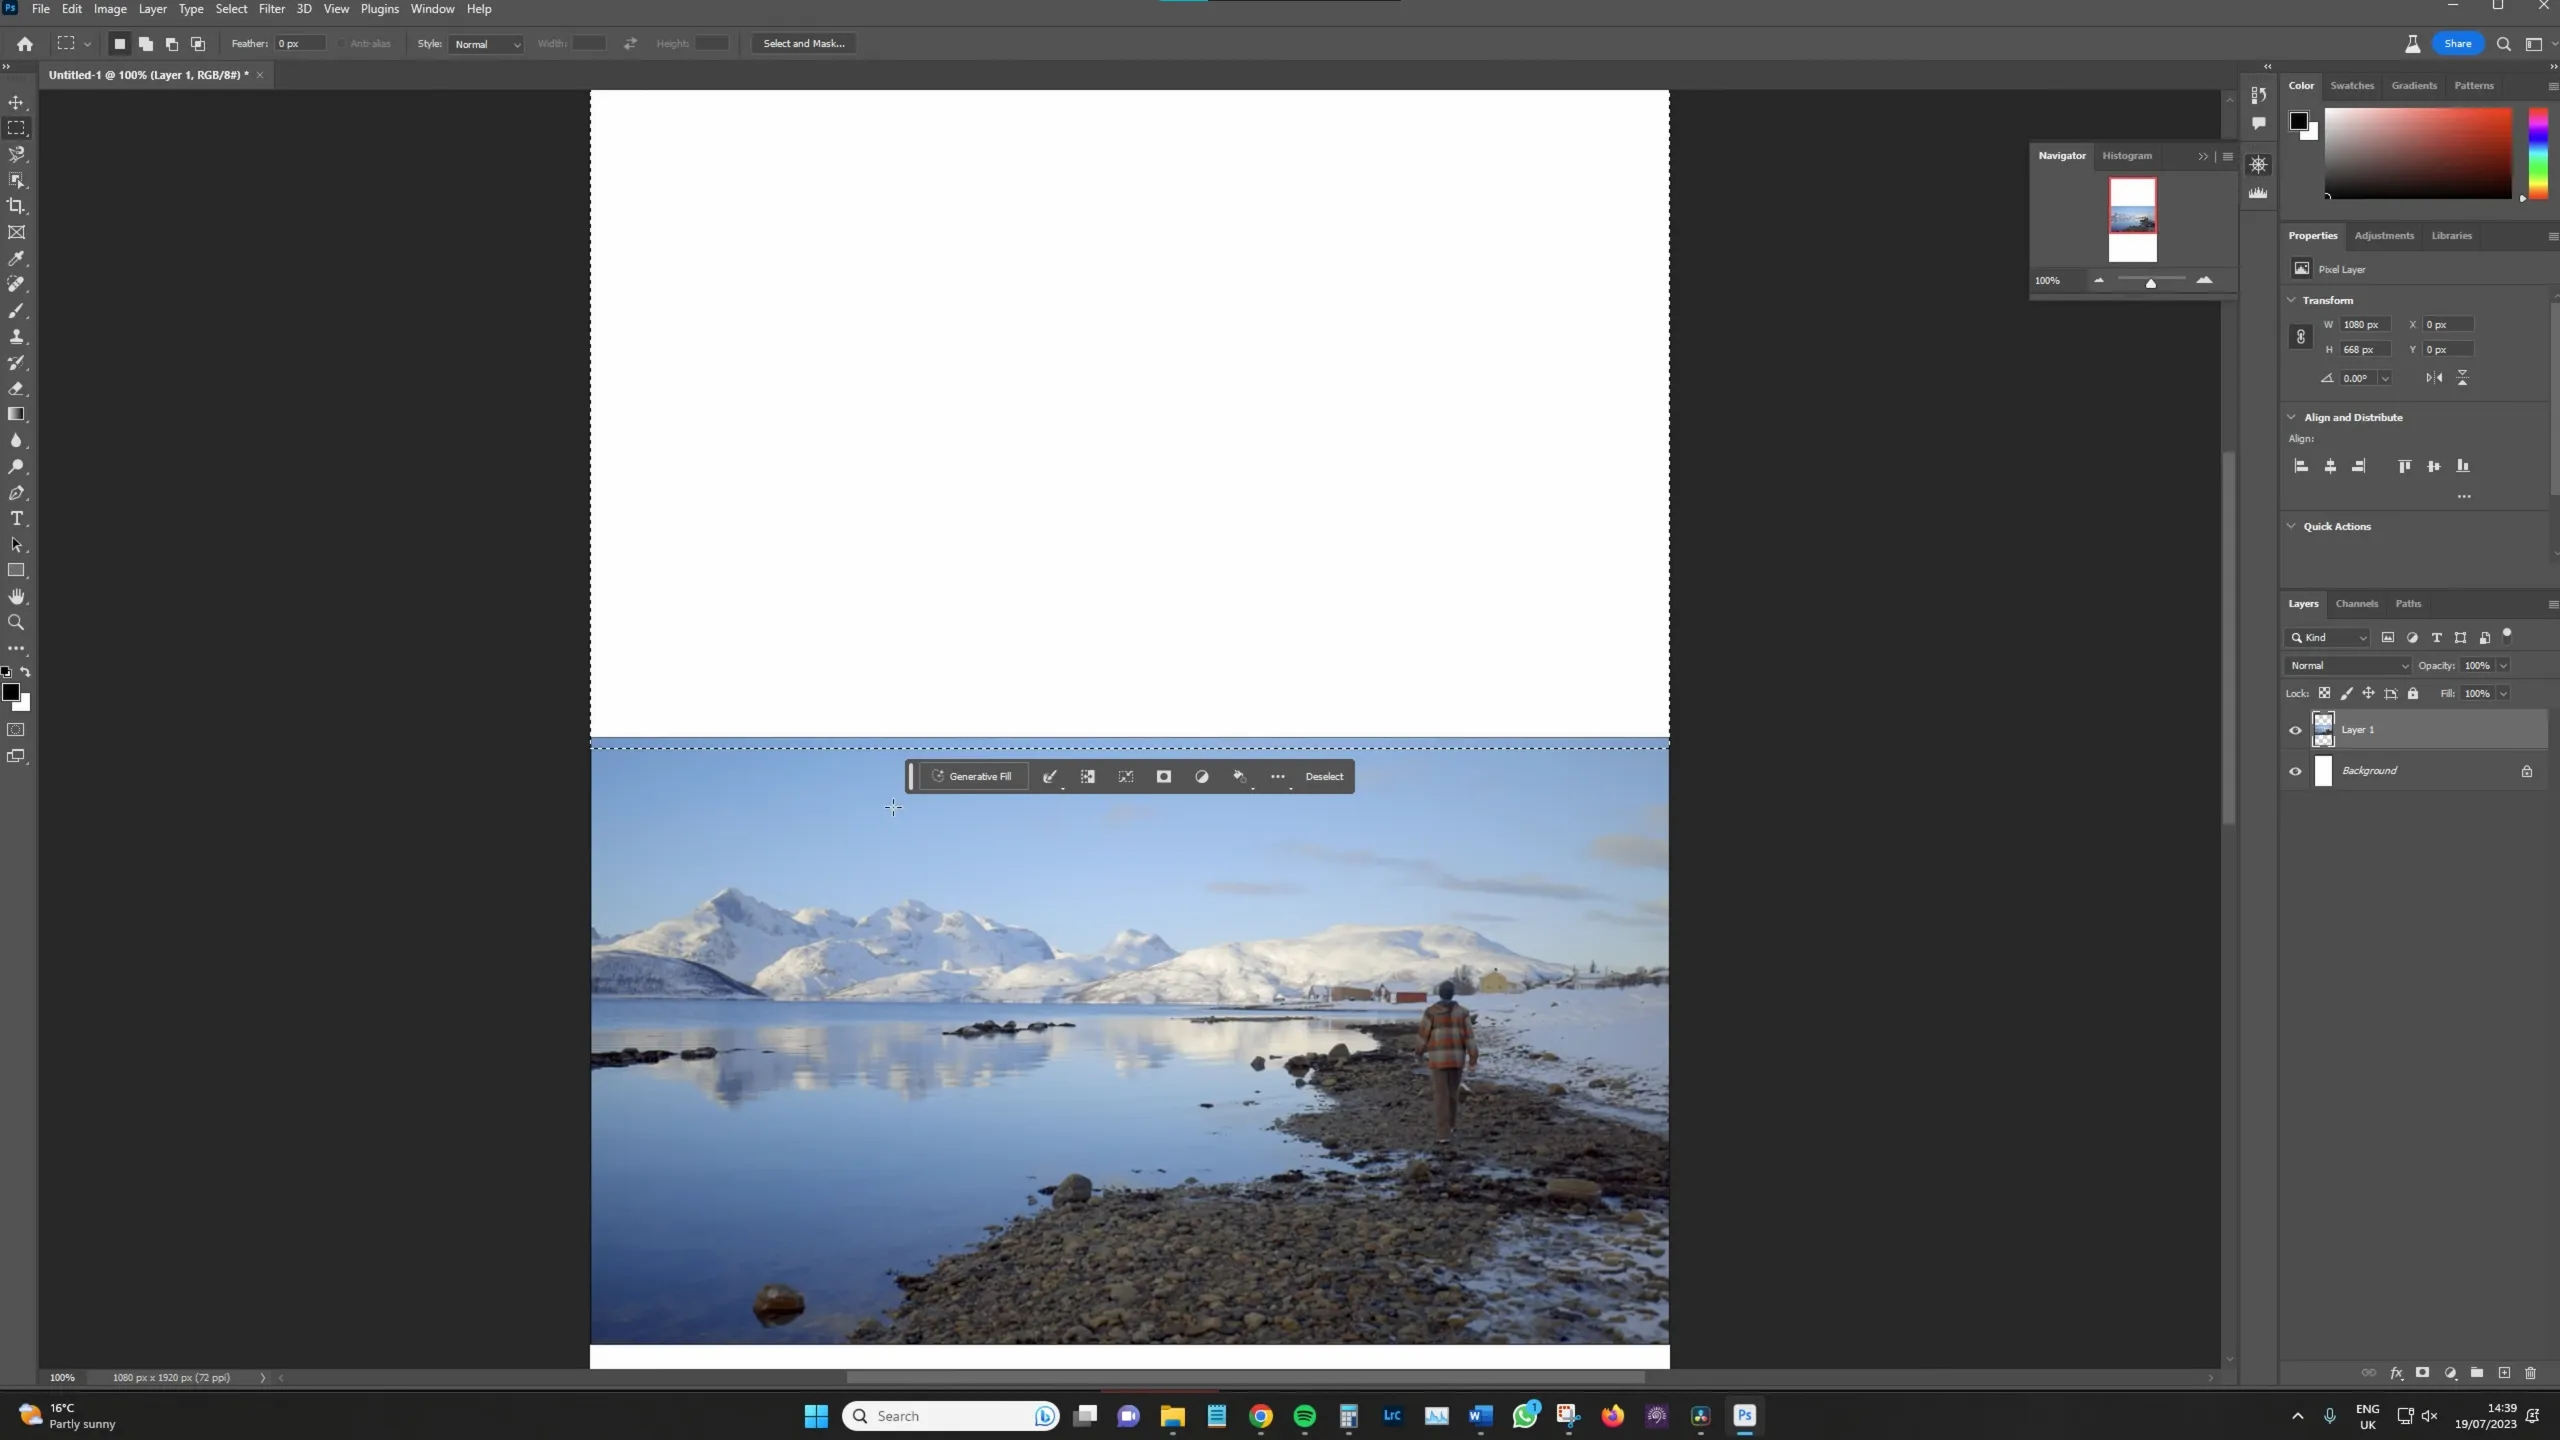
Next, we're going to open up Photoshop Beta. Select New File and set it to 1080 by 1920 to create a vertical composition at a 9x16 ratio. Paste in the screenshot. When resizing the image (Ctrl+T for transform), be sure to grab it from the mid anchor point to keep it centered.
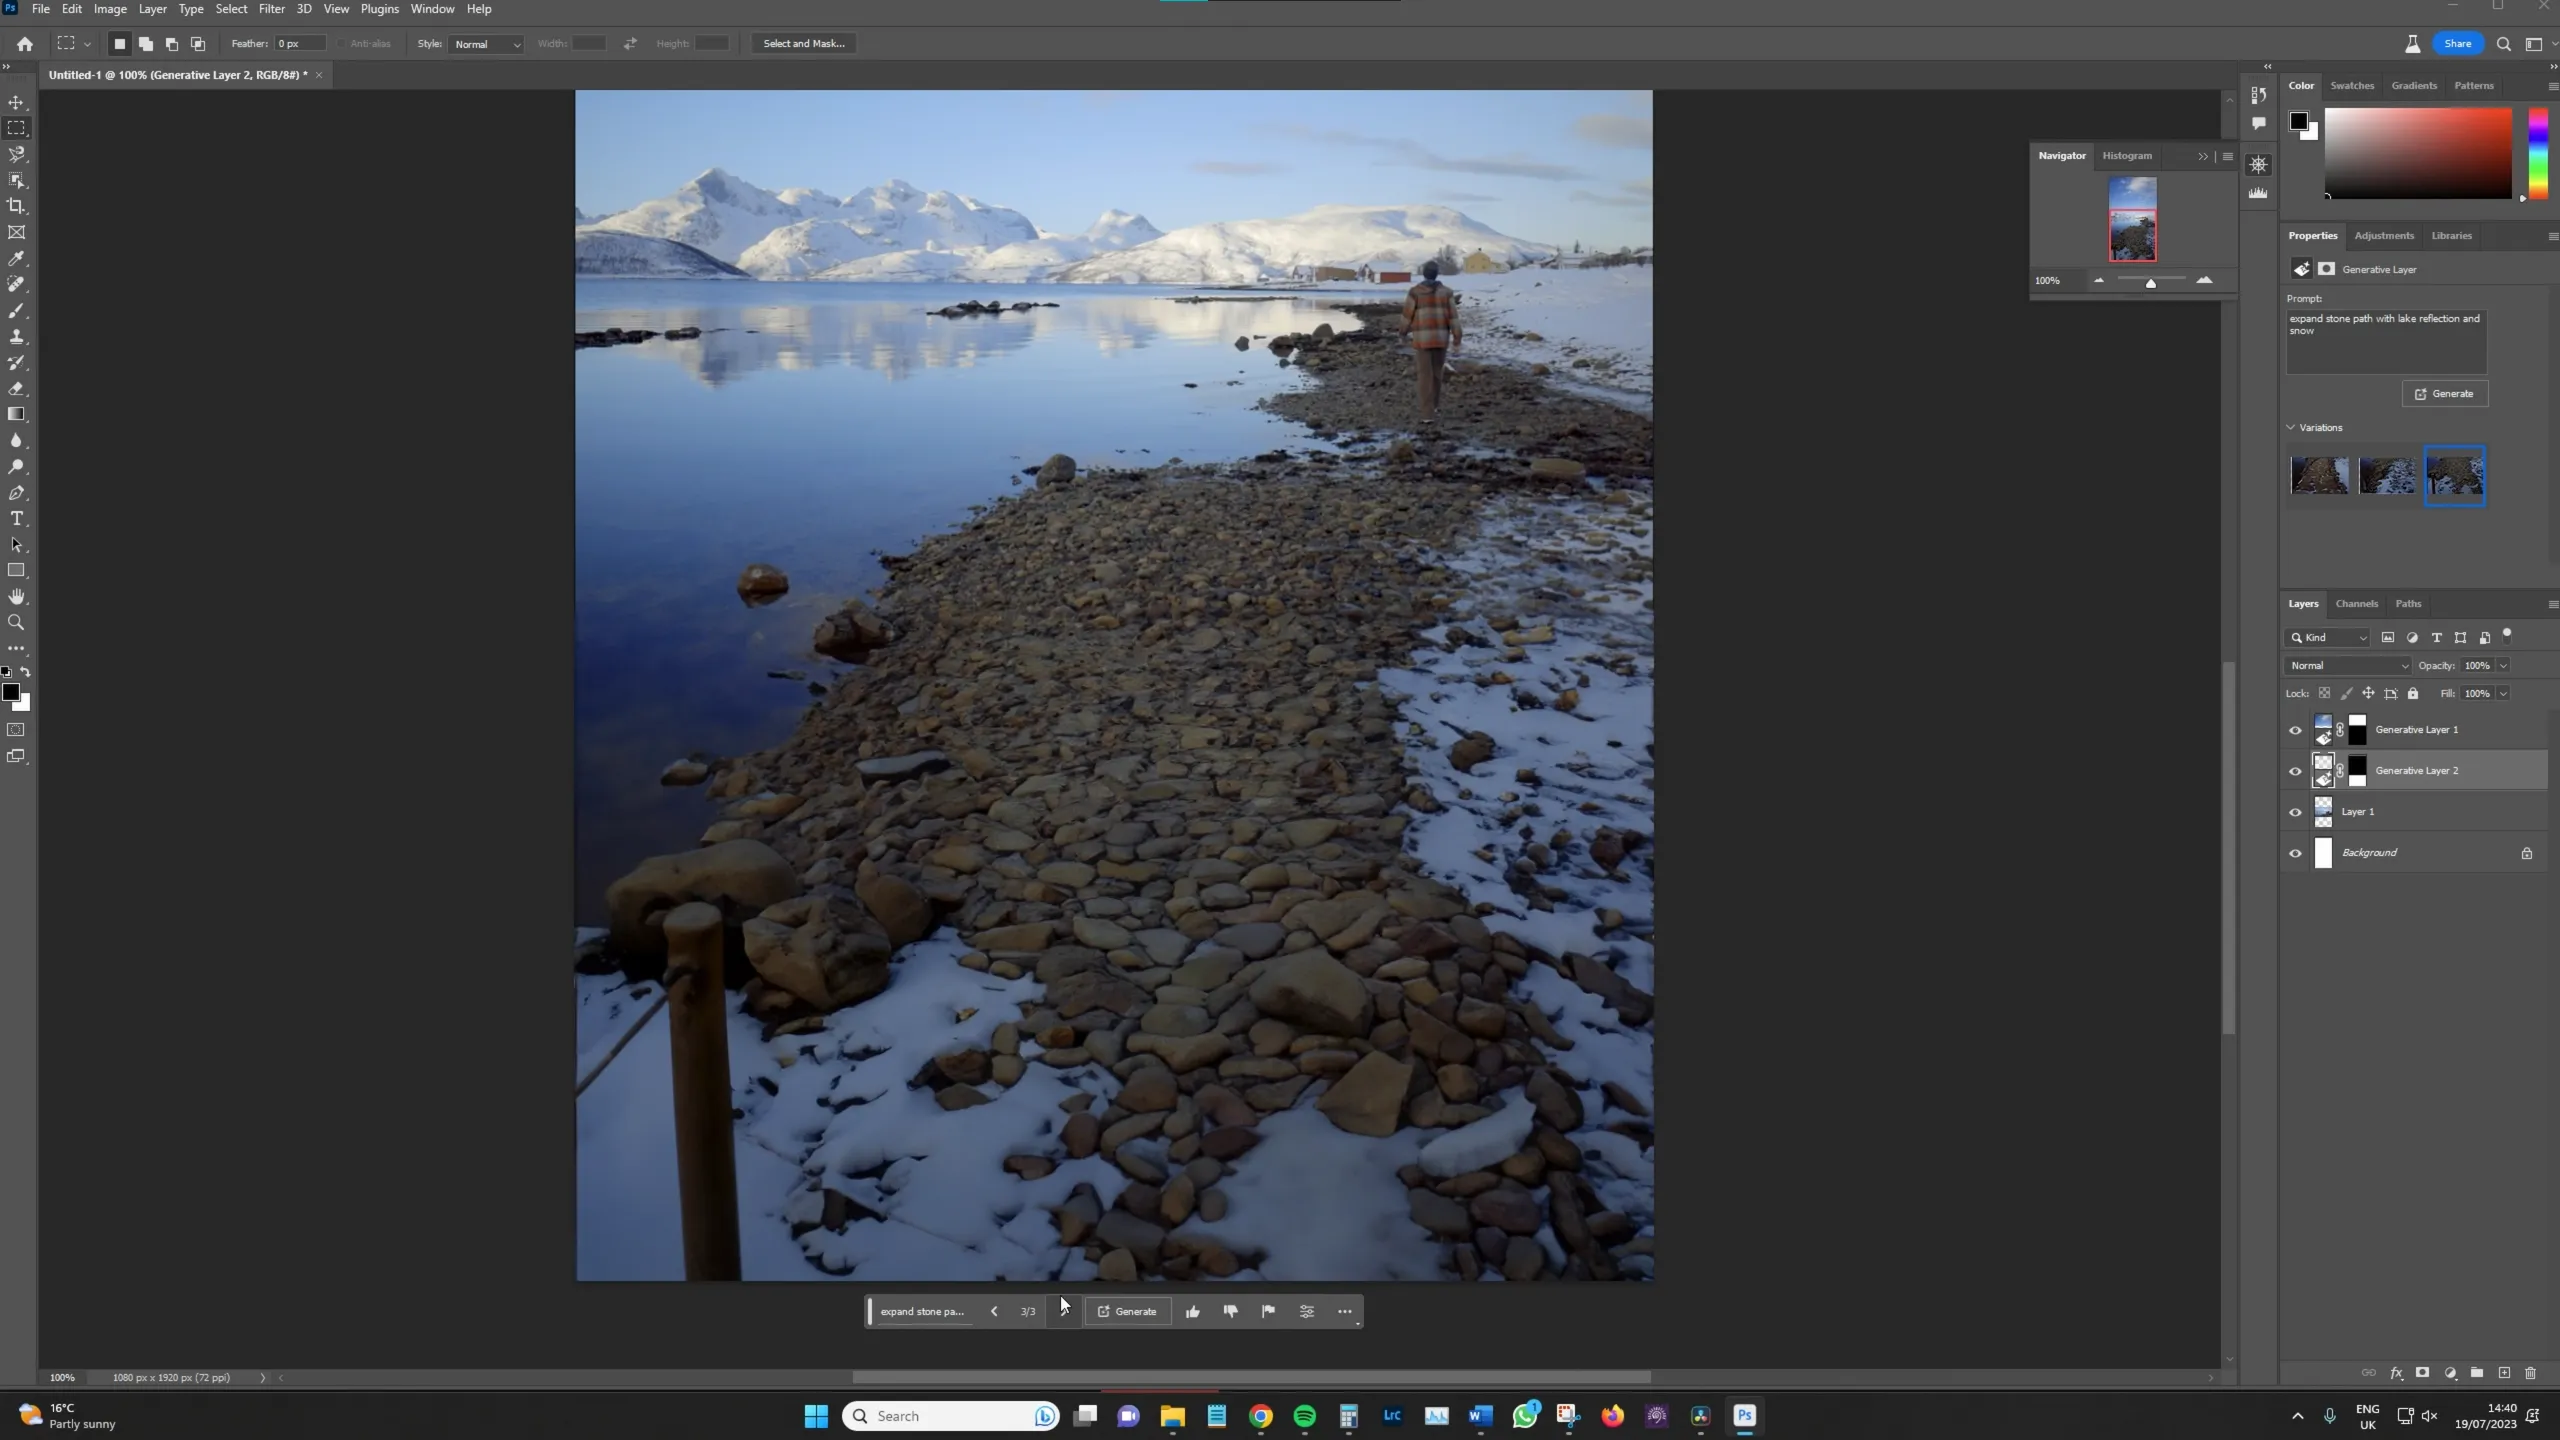
Generative Fill
Marquee Tool: Use the Marquee tool (M on the keyboard) to create a selection while overlapping a slight bit of the image. Then select
Generative Filland type in your prompt, e.g., "expand blue skies with the occasional cloud."Adjust and Save: Photoshop might not get it right off the bat, so you may need to tweak the prompts. Once satisfied, turn off the original image and background layer, then save as a PNG.
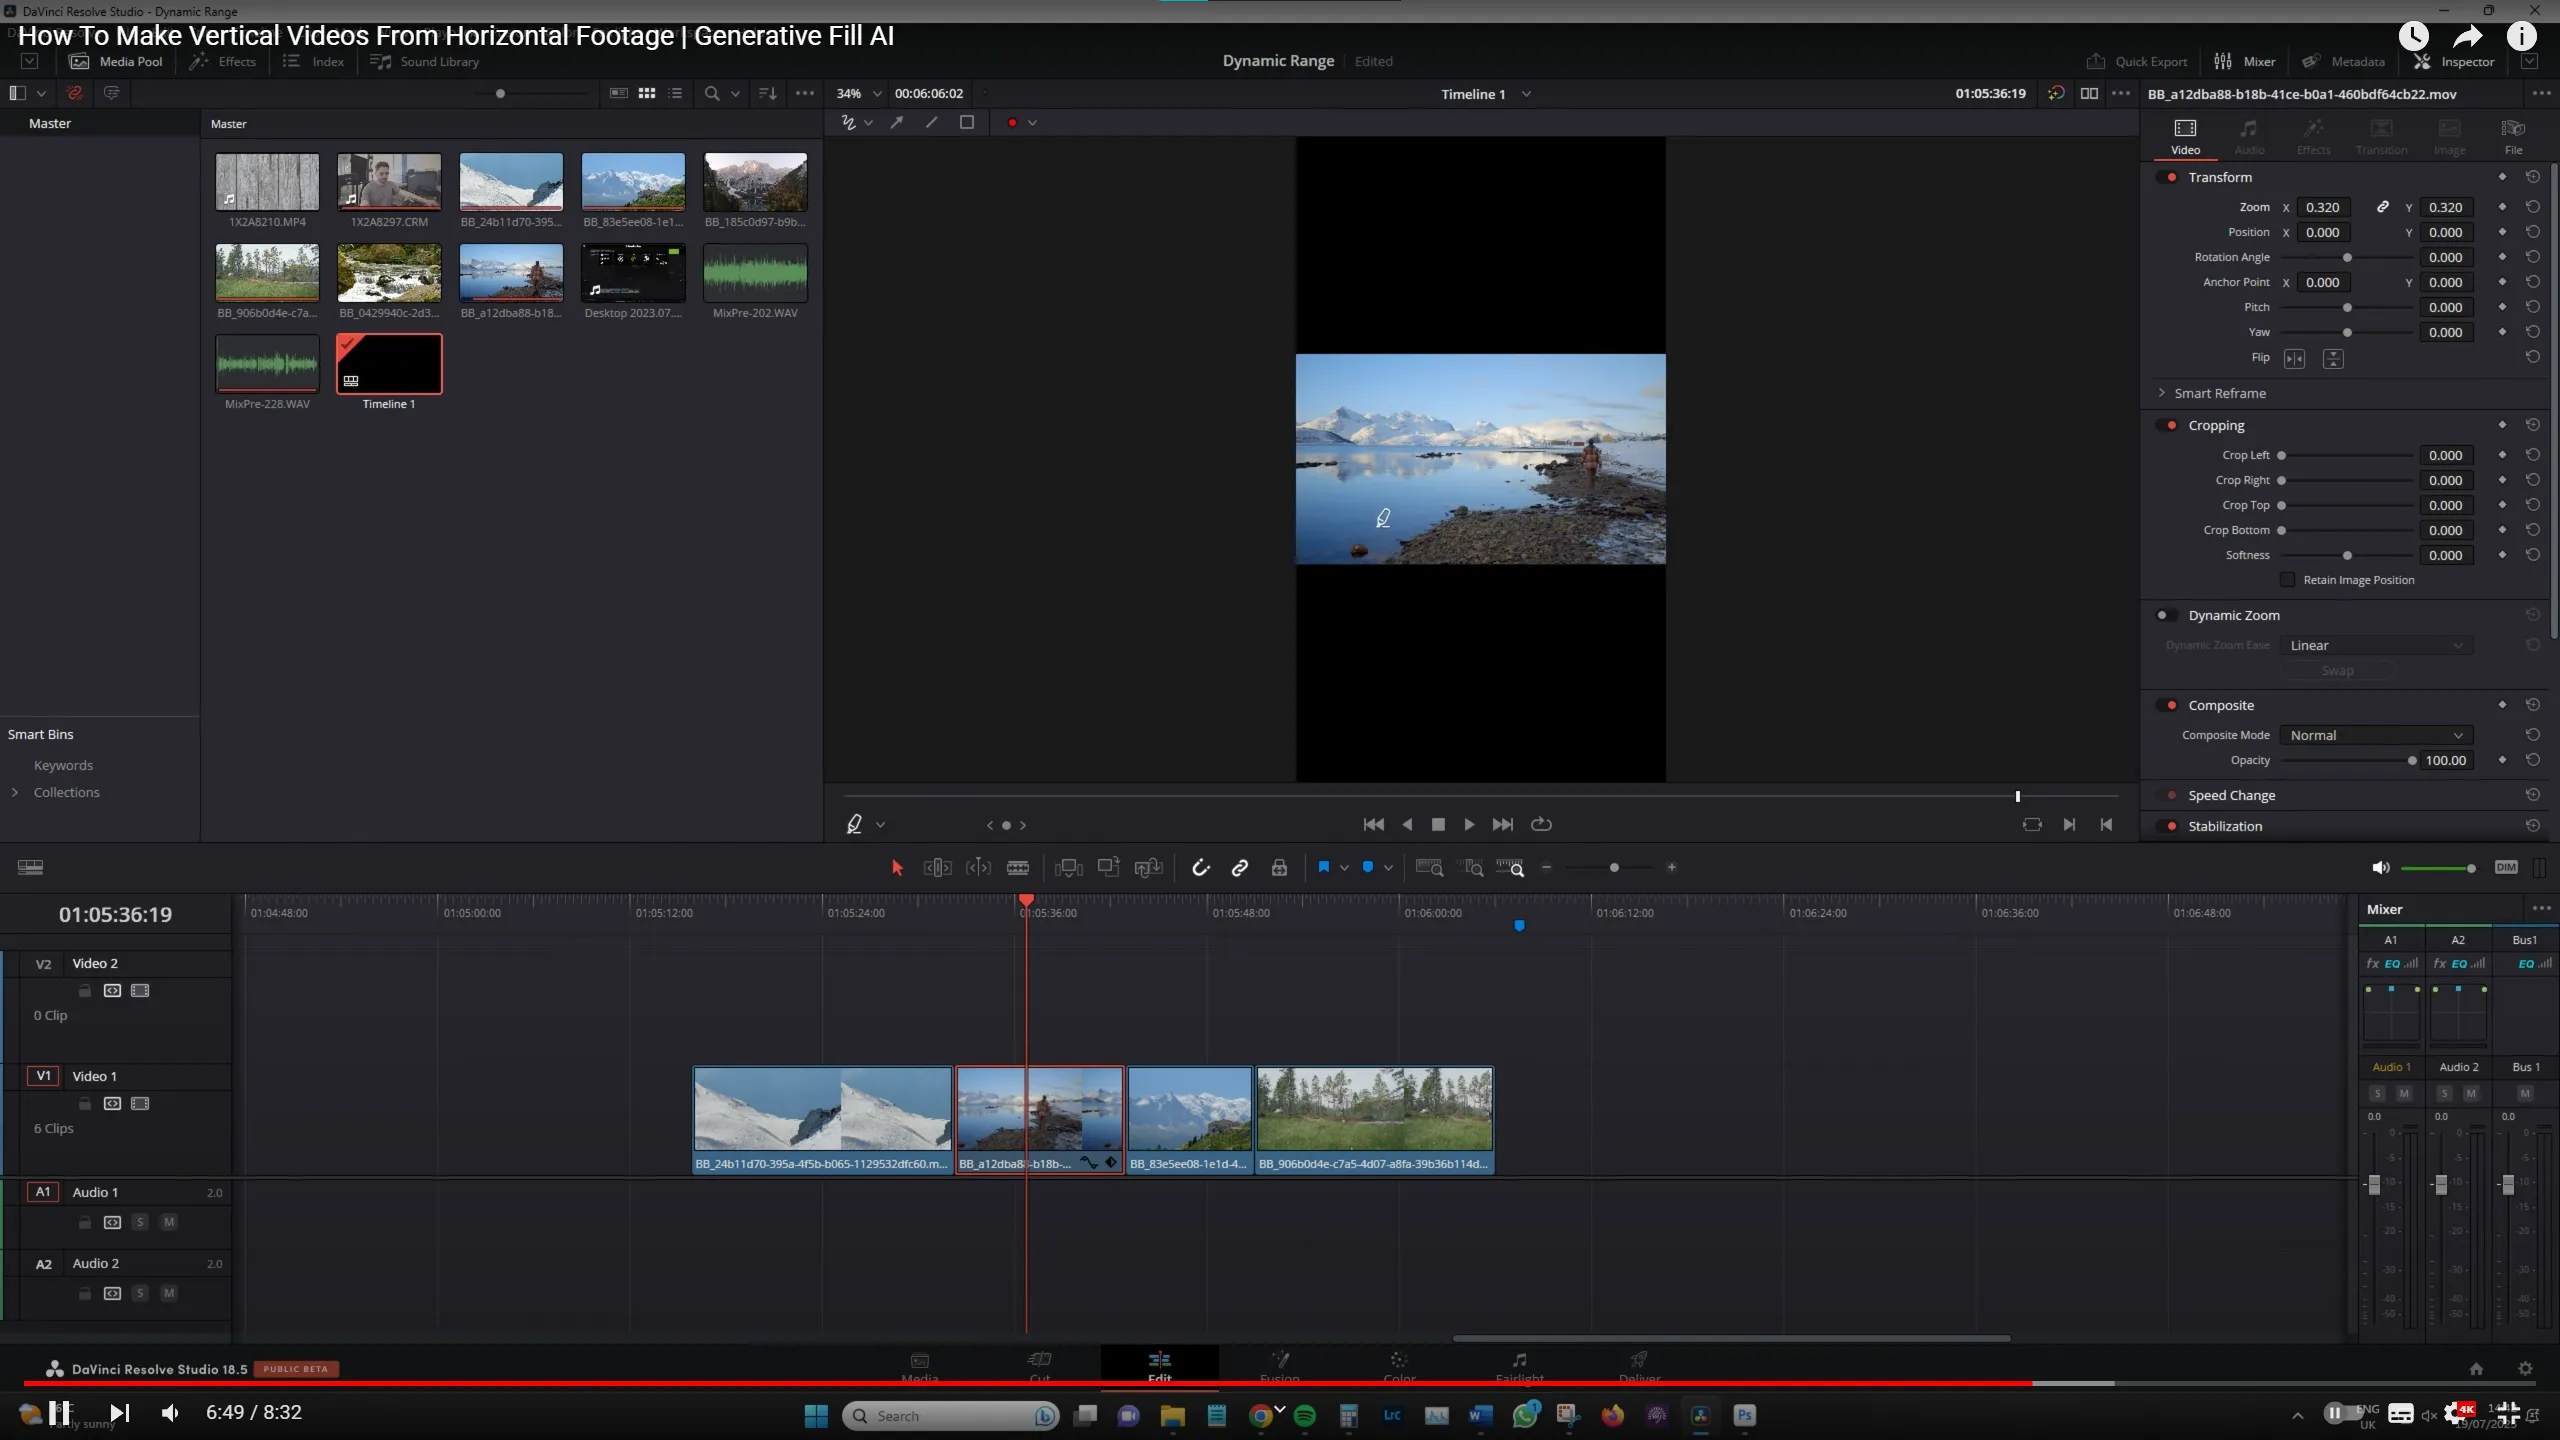
Back to DaVinci Resolve
Finally, go back into DaVinci Resolve and change the timeline resolution. Go to Timeline, untick Project Settings, and select vertical resolution.
- Adjusting Footage: By default, the 16x9 footage will be cropped. Zoom it down until it fits the frame.
- Adding PNG: Bring in your PNG and expand it across the frame.
Final Touches
To blend the two composites together, you can group them, select New Compound Clip, and add a grain in the color settings to give it a cohesive look.
Conclusion
This is pretty much it. Now it's on you to decide what film you're going to use this technique with. Remember, the camera needs to be static, and there should be no flow in motion in and out of the top of the composition. Photoshop Beta is your friend here. Be sure to tag us on social media if you follow this tutorial and create your own set. We'd be interested to see what you come up with.
Remember to subscribe. My name is Lewis, and I'll catch you guys next time.
Keywords
- Vertical videos
- Horizontal footage
- [Generative fill AI](https://www.topview.ai/blog/detail/Introduction-to-Generative-AI "Introduction to Generative AI")
- [Social media content creation](https://www.topview.ai/blog/detail/easy-social-media-content-creation-with-ai-scheduling-system "Easy Social Media Content Creation With AI Scheduling System")
- [DaVinci Resolve](https://www.topview.ai/blog/detail/introduction-to-davinci-resolve-full-course-for-beginners-2024 "Introduction to DaVinci Resolve - [Full Course] for Beginners (2024)")
- Photoshop Beta
- Creative [video editing](https://www.topview.ai/blog/detail/The-Best-Video-Editing-Software "The Best Video Editing Software")
FAQ
Q: Can I use any video editing software other than DaVinci Resolve to create vertical videos from horizontal footage?
A: Yes, you can use editing software like Premiere Pro or Final Cut Pro to follow the same process outlined in the article.
Q: Do I need to have advanced editing skills to use generative fill AI in Photoshop Beta for creating vertical videos?
A: While basic familiarity with Photoshop tools is helpful, the tutorial provides clear steps on how to use generative fill for filling blank areas in vertical compositions.
Q: How important is it to select static clips without camera movements when creating vertical videos?
A: It is crucial to choose static clips to ensure that the generative fill AI can accurately fill the blank areas in the vertical composition without distortions caused by motion.
Q: Will adding grain and adjusting opacity in the final steps improve the overall look of the vertical video created from horizontal footage?
A: Adding grain and adjusting opacity can help blend the two composites together and enhance the overall aesthetic of the vertical video, especially when shared on social media platforms with compression.