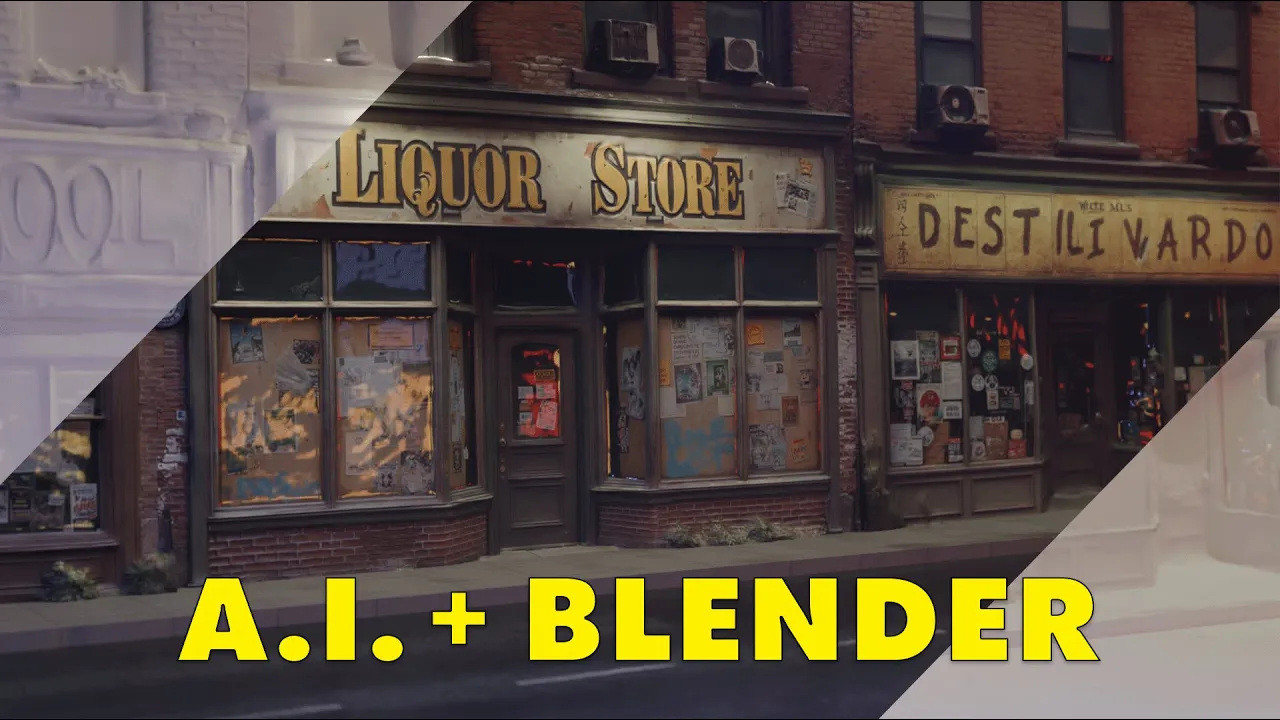
A.I.+ Blender - Simple 3D modeling with the help of A.I.
Film & Animation

Introduction
Creating 3D models can often be a challenging and time-consuming task, but with the advent of AI technologies, it is becoming increasingly accessible. In this tutorial, we'll explore a seamless way to turn AI-generated images into 3D facades in Blender without any modeling experience. Follow these detailed steps to enhance your workflow and bring your architectural visions to life!
Step 1: Download the Blender Add-on
Start by downloading the free Blender add-on that will facilitate the conversion of images into models. This add-on will streamline the process of generating 3D models from the textures you create.
Step 2: Generating AI Textures
We'll be using an AI image generator, such as Flux, to create the facade of a building. You can come up with your unique prompt or use a suggestion provided here. Once you generate an image you like, utilize any image editor to crop the image, ensuring that you only keep the façade of the building. Save the cropped image for the next steps.
Step 3: AI Segmentation
Next, we'll use an AI segmentation model hosted on Hugging Face. Upload your facade image, select the inpainting option, and input a prompt specifying what you want the model to detect—such as "window panes." After running the process, you'll receive multiple images, but focus on saving the black-and-white mask generated.
Step 4: Depth Estimation
For depth estimation, you can utilize a tool called Maragold. Upload your facade image into Maragold, increase the ensemble size to 20, and run the model. Once it's finished processing, make sure to save the grayscale depth map that it generates.
Step 5: Generating Normal Maps
For the normal map, the Smart Normal tool is quite effective. Upload your image, follow the prompts, and save the generated normal map once it's completed.
Step 6: Creating a Roughness Map
To create a roughness map, use a high-pass filter from a website specifically designed for this purpose. Adjust the depth setting to about 3, then upload your image to generate and save the roughness map.
Step 7: Organizing Your Texture Files
Create a new folder for your textures (you can name it something like "textures"). Upload all of the images you have generated into this folder and ensure they are renamed according to their purposes: normal, depth, mask, diffuse, and roughness. Correct naming is crucial for the add-on to function properly.
Step 8: Importing Textures into Blender
In Blender, open the preferences and navigate to the add-ons section to install the add-on you downloaded earlier. Select the PBR script, then press CTRL + A, choose mesh, and select ‘import plane from image’. Import all of your images, and you should see a textured model appear in your scene.
Step 9: Final Adjustments and Testing
After importing, you might want to tweak the displacement and subdivision modifiers to achieve the desired appearance. Now you're ready to experiment with lighting and add other elements to enrich your scene.
With these steps, you can transform AI-generated images into stunning 3D facades using Blender—all without the need for extensive modeling knowledge!
Keywords
- AI image generation
- Blender add-on
- Texture mapping
- Facade creation
- Segmentation model
- Depth map
- Normal map
- Roughness map
FAQ
Q1: Do I need any prior modeling experience to follow this tutorial?
A1: No, this tutorial is designed for users without modeling experience, utilizing AI tools to automate the process.
Q2: What AI tools do I need for texture generation?
A2: You'll need an AI image generator (like Flux), an AI segmentation model (on Hugging Face), Maragold for depth estimation, and Smart Normal for normal maps.
Q3: How do I rename my texture files correctly?
A3: Name your files as follows: normal, depth, mask, diffuse, and roughness. Proper naming is essential for the add-on to work effectively.
Q4: Can I customize my 3D model?
A4: Yes, you can adjust the displacement and subdivision modifiers in Blender and add various lighting and elements to enhance your scene.
Q5: Is the Blender add-on really free?
A5: Yes, the add-on mentioned for this workflow is free to download and use.

