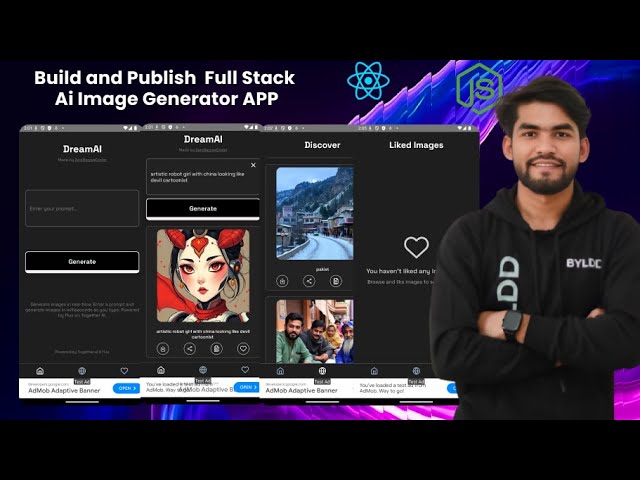
Build a Full Stack AI Image Generator App in React Native| Bottom Tab Navigation Setup and Style 4
Science & Technology

Introduction
In this article, we will explore how to create a bottom tab navigation in a React Native application, specifically as part of a Full Stack AI Image Generator app. Setting up bottom tab navigation is an essential feature for most mobile applications as it facilitates easy navigation between multiple screens.
Step 1: Setting Up React Navigation
To get started with bottom tab navigation in React Native, we first need to install the necessary packages. Open your terminal and follow these steps:
Install React Navigation Native:
npm install @react-navigation/nativeInstall Required Dependencies:
npm install react-native-screens react-native-safe-area-contextNext, we need to wrap the root app component with the
NavigationContainer. Here’s a code snippet to illustrate:import 'react-native-gesture-handler'; import React from 'react'; import ( NavigationContainer ) from '@react-navigation/native'; export default function App() ( return ( <NavigationContainer> {/* Other navigators will be added here */) </NavigationContainer> ); }Install Bottom Tabs Navigation:
npm install @react-navigation/bottom-tabsCreate Tabs: You can create a tab navigator by importing the required components:
import ( createBottomTabNavigator ) from '@react-navigation/bottom-tabs';

const Tab = createBottomTabNavigator();

function MyTabs() (
    return (
        <Tab.Navigator>
            <Tab.Screen name="Home" component={HomeScreen) />
            <Tab.Screen name="Settings" component=(SettingsScreen) />
        </Tab.Navigator>
    );
}
Step 2: Creating Screen Components
Next, we’ll create individual screen components for each tab. Inside your project directory:
- Create a folder named
src. - Inside the
srcfolder, create another folder namedscreens. - Now create three files:
HomeScreen.tsx,DiscoverScreen.tsx, andLikeScreen.tsx.
Example of HomeScreen Component
import React from 'react';
import ( View, Text ) from 'react-native';

const HomeScreen = () => (
    return (
        <View>
            <Text>Home Screen</Text>
        </View>
    );
);

export default HomeScreen;
Step 3: Implementing Screen Navigation
After creating the screens, import them into your App.tsx and configure the tab navigator accordingly. Remove any default components and implement your custom screens.
import HomeScreen from './src/screens/HomeScreen';
import DiscoverScreen from './src/screens/DiscoverScreen';
import LikeScreen from './src/screens/LikeScreen';

<Tab.Navigator>
    <Tab.Screen name="Home" component=(HomeScreen) />
    <Tab.Screen name="Discover" component=(DiscoverScreen) />
    <Tab.Screen name="Likes" component=(LikeScreen) />
</Tab.Navigator>
Step 4: Styling the Bottom Tab Navigation
To enhance the aesthetic appeal, you can customize your tab bar's appearance. For example, you can change background colors and set icon sizes. You can also hide the header using the following code:
<Tab.Navigator screenOptions=({ headerShown: false )}>
    (/* Tab screens */)
</Tab.Navigator>
Step 5: Adding Custom Icons
To set custom icons for each tab, you’ll leverage the react-native-vector-icons library. Install it via:
npm install react-native-vector-icons
Then import your desired icon sets into your components. For example, for the Home screen icon:
import Icon from 'react-native-vector-icons/Feather';

// Inside your tab navigator options
<Tab.Screen
    name="Home"
    component=(HomeScreen)
    options=({
        tabBarIcon: ({ color, size )) => (
            <Icon name="home" color=(color) size=(size) />
        )
    }}
/>
Summary
In this article, we discussed how to set up a bottom tab navigation for your React Native application. We covered the installation of necessary dependencies, the creation of screen components, and styling the navigation bar, including adding custom icons. Implementing bottom tab navigation is a critical step for a better user experience in any mobile application.
Keywords
React Native, Bottom Tab Navigation, Install Navigation, Create Screens, Customize Icons, Navigation Container, Setup Navigation.
FAQ
Q: What is React Navigation?
A: React Navigation is a popular library for routing and navigation in React Native applications.
Q: How do I install React Navigation?
A: You can install it using npm with the command npm install @react-navigation/native.
Q: Can I customize the icons in the tab navigation?
A: Yes, you can use libraries like react-native-vector-icons to add custom icons to your tab navigator.
Q: How can I hide the header in my application?
A: You can hide the header by setting headerShown: false in the screen options of your Tab Navigator.
Q: Where should I create my screen components?
A: It’s best practice to create a separate directory for your screens within your source folder, typically named src/screens.

