Code explanation
People & Blogs

Code Explanation
In this article, I will walk you through the code that I used to develop a program for my LED light installation. This code involves button inputs, loops, functions, and logical checks to control the LED light strip and manage different statuses like normal mode, supercharging mode, and bloom mode. Let's dive into the code details.
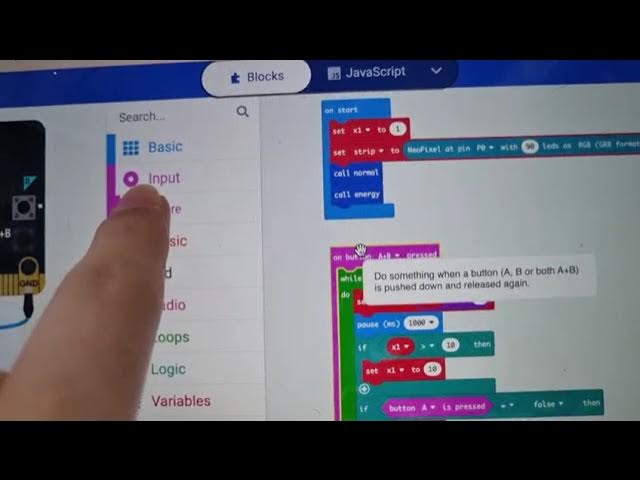
Setting Up Variables
I started by setting up two variables:
- X1: This variable is used to add up numbers to switch between the three statuses.
- strip: This variable controls the number of LEDs in the light strip.
Button Press Handling
When both button A and button B are pressed simultaneously, the variable X1 increments by one continuously. Once X1 exceeds zero, it is reset to zero. If the buttons are released, X1 is set back to one. The show string function displays the current status, helping me track if the code is running correctly.
Functions for Different States
I created two main functions:
Normal and Supercharging Status:
- Normal Status: When X1 equals one, this mode runs. It changes the color of the LED light from one end to the other, cycling through colors.
- Supercharging Status: When X1 is between 2 and 10, this mode runs. Here, the LED lights that were originally rainbow-colored turn green.
Energy Status:
- Bloom Status: When X1 equals zero, this mode runs. The blue lights gradually fade to green and then revert back to blue after a pause, running the normal state again.
Input Handling
The input code primarily deals with button presses or logos. These inputs trigger the actions I have planned in the code.
Loops
Using loops allowed me to make the code less messy and more efficient. For example, checking if both button A and B are pressed continuously adds up the value of X1 without needing redundant code lines.
Functions
Functions make the code more modular and manageable. I can call these functions anywhere in the code, reducing repetition and keeping it clean.
Logic
The logic plays a crucial role in determining which state or status the code should run. For example, if X1 is greater than zero, it runs a specific code block; otherwise, it executes a different code block.
Pixel Handling
This section is crucial as it connects the code to the LED light strip, enabling the customization of colors and the execution of different light patterns.
Overall, this code efficiently handles various statuses and transitions for the LED light strip, making it versatile and easy to manage.
Keywords
- LED light installation
- Button inputs
- Variable setup
- Functions
- Loops
- Logic
- Pixel handling
- Normal status
- Supercharging status
- Bloom status
FAQ
Q: What does the variable X1 do? A: X1 is used to add up numbers to switch between the three states: normal, supercharging, and bloom statuses.
Q: How are button presses handled in the code? A: When both button A and B are pressed, X1 increments continuously. If X1 exceeds zero, it resets to zero; releasing the buttons sets X1 back to one.
Q: What are the different statuses managed by the code? A: The code manages three statuses: normal status, supercharging status, and bloom status.
Q: How do functions help in the code? A: Functions make the code modular and reduce redundancy, allowing you to call specific code blocks wherever needed.
Q: Why is the pixel handling important in this code? A: Pixel handling connects the code to the LED light strip, enabling customization of colors and light patterns essential for the different states.

