

Create a custom GPX file and generate a 3D map from it using Google Maps and the 3D Mapper plugin
Education
Introduction
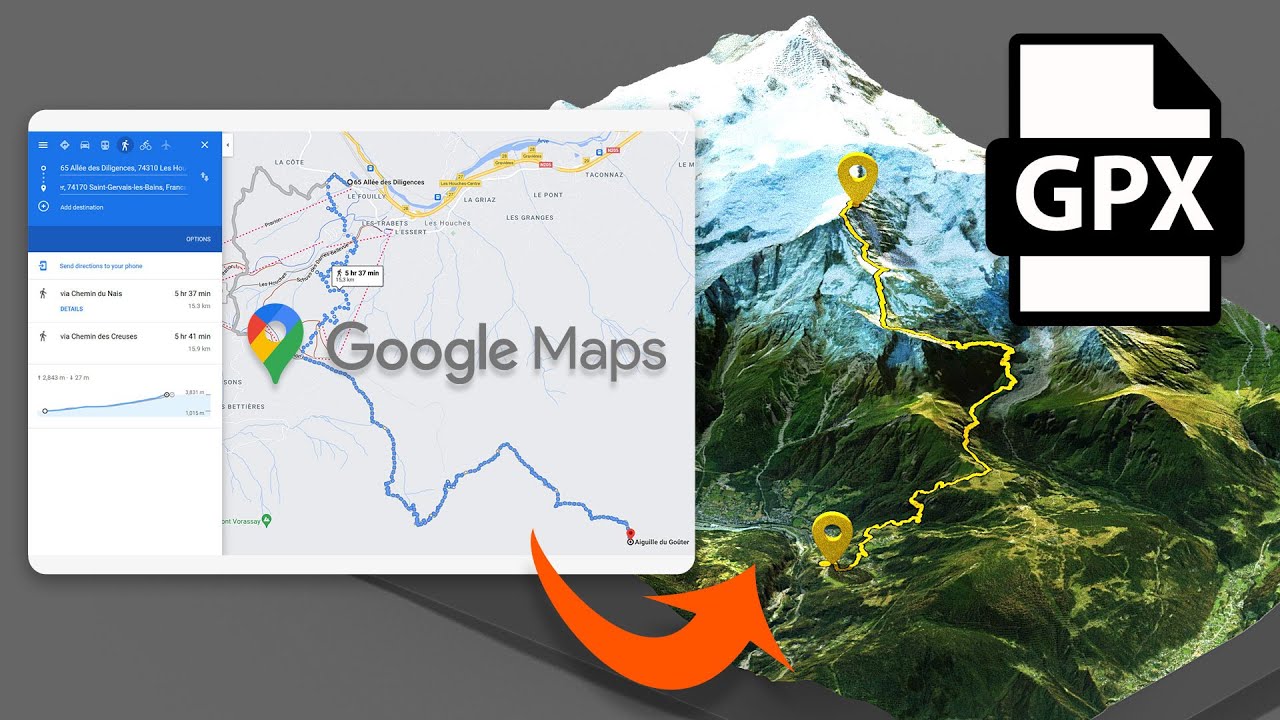
In this tutorial, you will learn how to create your own GPX file from Google Maps directions and subsequently generate a 3D map using the 3D Mapper plugin in Photoshop. This method is quite straightforward and allows you to visualize a track with precision. By following the steps outlined below, you will be able to create an imaginary track leading from a parking area to a mountain location, specifically in the Mont Blanc massif.
Step-by-Step Process
Create the Route:
- Start by clicking on the directions symbol in Google Maps to set up your route. For this tutorial, select "walking" as your mode of transport.
- Use a specific parking ground as your starting point—pick a location in the Les Houches area.
- To fine-tune your route, you can add or remove intermediate waypoints until you’re satisfied with the path generated.
Generate the Route Link:
- Once your route is completed, click on "Details" to generate a link to your route map.
- After obtaining the link, click on the share icon to copy it to your clipboard.
Convert Link to GPX File:
- Use the free service available at mapstickpx.com to convert the Google Maps link you just copied into a GPX file.
- If you find the service useful, consider donating a small amount to support its continued operation.
Download and Import GPX:
- Paste your link into the designated box on mapstickpx.com and click on "Let's Go" to produce your GPX file.
- Save the generated GPX file on your device.
Using Photoshop with the 3D Mapper Plugin:
- Open Photoshop and launch the 3D Mapper plugin. Use the advanced search feature in the plugin to import the GPX file you downloaded.
- Select your desired track color, map type, and size to create your map set.
Finalize Your 3D Map:
- Download the created map set and give it a name for easy retrieval in the library.
- The map set will comprise a height map, a map texture, and the GPX track, all of which will be treated as individual photo layers in Photoshop.
- Choose the map quality that best fits your project and proceed to create your 3D map.
Customization:
- With your 3D map completed, you can now customize it to fit your vision. Adjust the lighting, modify the height, rotation, or position of the map elements.
- Enhance your map further by adding 3D elements, such as markers indicating the starting and finishing points.
Keywords
- GPX file
- Google Maps directions
- 3D Mapper plugin
- Photoshop
- Route creation
- Mont Blanc massif
- Intermediate waypoints
- Mapstickpx.com
FAQ
Q1: What is a GPX file?
A1: A GPX file is a type of file format used for storing and sharing GPS data, including waypoints, tracks, and routes.
Q2: Can I create GPX files for biking or driving routes as well?
A2: Yes, the same method can be applied for biking or driving routes by selecting the appropriate mode of transport in Google Maps.
Q3: What is the 3D Mapper plugin used for?
A3: The 3D Mapper plugin in Photoshop allows users to create and visualize 3D maps using various types of geographic data, including GPX files.
Q4: Is the service at mapstickpx.com free?
A4: Yes, the service is free to use, but donations are encouraged to support its continued operation.
Q5: Can I edit my 3D maps after creating them?
A5: Absolutely! After generating your 3D map, you can customize it in Photoshop by adjusting various elements such as lighting, rotation, and adding 3D markers for locations.