Extreme Level Photo Restoration in Photoshop
Education

Introduction
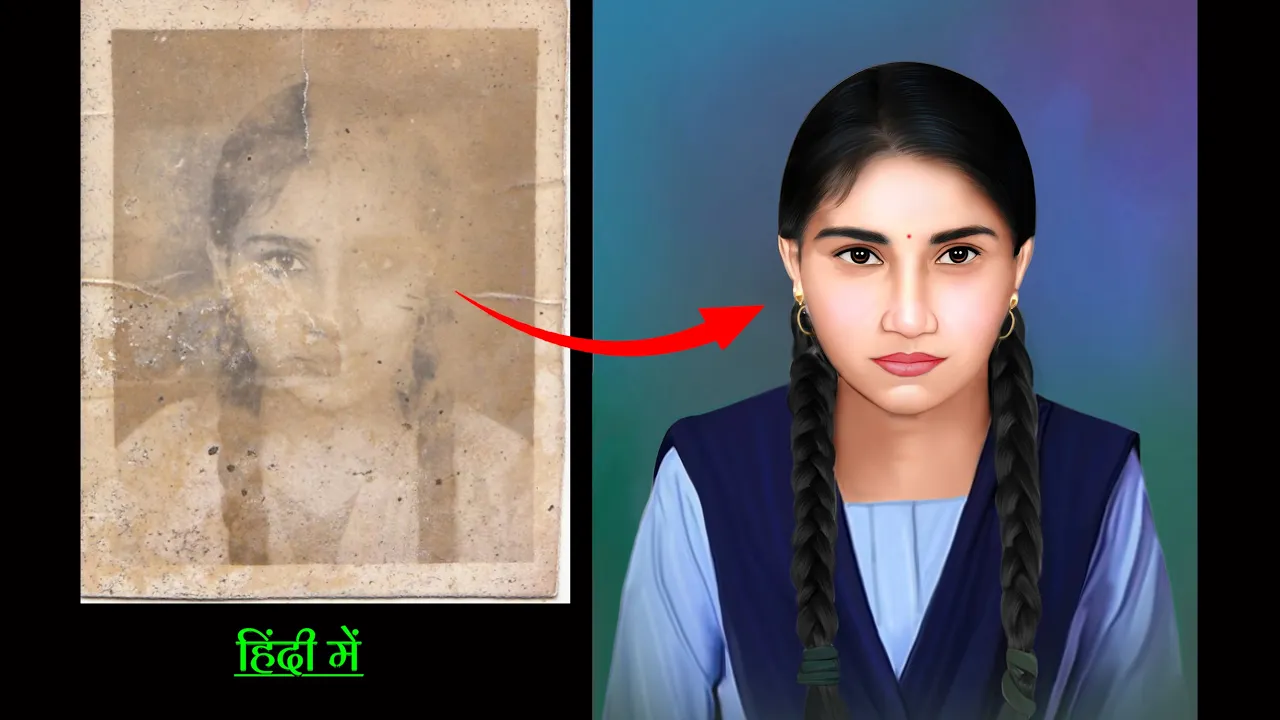
In today’s video, we delve into the intricate process of photo restoration, showcasing an impressive transformation using Photoshop. The task at hand begins with a heavily damaged photo submitted by a customer. Upon close inspection, it is evident that the photo lacks numerous details, particularly in the lip area, and has visible stains and tears. This article outlines the step-by-step process of modernizing and restoring the photo to its former glory.
First, I applied some initial treatment using the Renemi app to assess the damage better. The photo appeared slanted, reminiscent of a pakoda, but provided limited details, featuring one eyebrow and one eye. I proceeded to make a copy of the original image and ensured that it was properly sized by trimming and aligning it in the center for a more aesthetic appearance.
Removing the unnecessary background was crucial to enhance the focus on the subject. I selected the intricacies of the damaged photo, carefully eliminating the background to avoid any subsequent issues. After that, I addressed the color tone as the initial image suffered from low color saturation and numerous spots. Using the Control U function, I adjusted the mid-tone slider to achieve an appropriate black-and-white effect, enhancing the overall tone.
To tackle the visible stains and spots, I utilized the Spot Healing Tool to effectively clean the image without compromising on details. I wanted the final photo to have depth and contrast; thus, I made various adjustments to manipulate the highlights and shadows to elevate the overall aesthetic appeal.
After cleaning and detailing, I brightened the image a bit more, focusing on the skin tone adjustments through color balance. Masking and selective application enabled refinement of areas like the lips and eyebrows while increasing the warmth in the skin color. The finishing touches included adding some pink to the cheeks for variation and dimension.
Next, the clothing detail was addressed. I sourced a school uniform online, allowing for a more uniform look rather than drawing it manually. I faded this part on the photo to ensure it didn’t draw too much attention away from the subject’s face.
The final touch involved selecting a suitable blue backdrop that accentuated the focal elements without overshadowing them. A comparison of the restored image against the original reveals a dramatic transformation – from a torn, faded photograph to a vibrant, aesthetically pleasing one that retains its essence and details.
In conclusion, photo restoration in Photoshop can yield extraordinary results with patience and careful application of tools available. The improvement in detail, color balance, and overall presentation highlights the power of digital restoration technology.
Keywords
- Photo Restoration
- Photoshop
- Damaged Photo
- Color Balance
- Spot Healing Tool
- Black and White Effect
- Background Removal
- Brightness Adjustment
- Skin Tone
- Digital Technology
FAQ
What tools are essential for photo restoration in Photoshop?
- Essential tools include the Spot Healing Tool, various adjustment layers for color balance and brightness, and selection tools to isolate the subject and background.
How can I enhance color in a photo that appears faded?
- Adjust the mid-tone slider using Control U for proper tone enhancement, and utilize color balance to reinforce specific colors or adjust the skin tone accordingly.
What should I do if the photo has physical damage like tears and stains?
- Use the Spot Healing Tool to carefully remove any stains or flaws while ensuring that the overall details of the photo are preserved.
Is it necessary to digitally draw clothing or can I use reference images?
- It is often easier and more efficient to download reference images for clothing, particularly for specific attire, to streamline the restoration process.
How can I compare the original and restored images effectively?
- Place both images side by side in a photo viewer or application that allows for easy comparison, which highlights the improvements made during the restoration process.

