

Free Personalized AI Chatbot Agent on your website | Framer | Webflow | Wordpress | Botpress
People & Blogs
Introduction
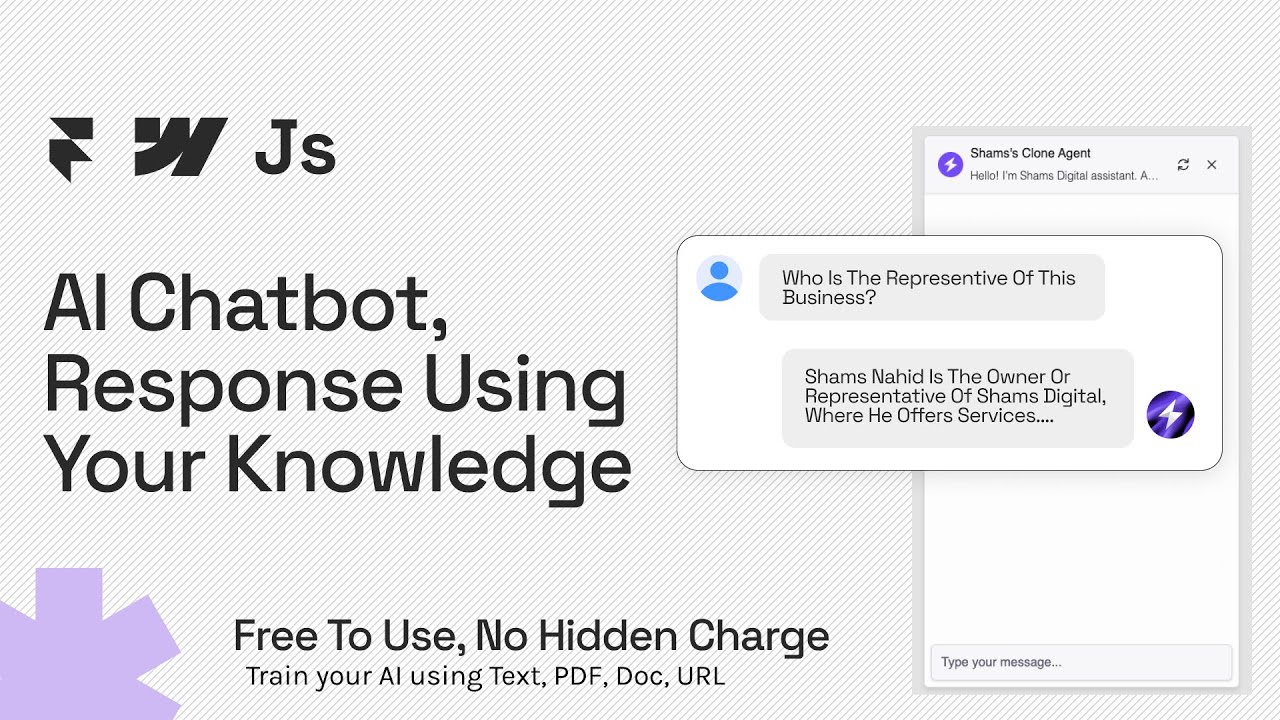
In this article, we'll explore how to create and implement a personalized AI chatbot for your business using a no-code tool called Botpress. This versatile chatbot can engage with customers directly on your website, making it easier for you to provide support and generate leads without the need for any coding skills.
Getting Started with Botpress
Sign Up: To get started, search for Botpress online and sign up for an account. After signing in, you will be redirected to the Botpress dashboard.
Create a New Bot: Click on "Create a new bot" and then select "Opening Studio". You’ll find various pre-made templates, but for this guide, we’ll start from scratch. Hit the “Use template” option to open the bot creation interface.
Understanding the Interface: The Botpress interface includes several options for customization. Instead of diving deep into all functionalities, it’s advisable to refer to Botpress's YouTube channel for comprehensive tutorials. However, I will guide you through the essential steps to implement the chatbot on your website.
Implementing Your Chatbot
Web Integration
Botpress supports integration with various platforms, including Webflow, Framer, WordPress, or even custom-built websites. To set this up, follow these steps:
Publish Your Bot: After you’re satisfied with your bot's setup, click on “Publish”.
Customization: Navigate to the “Customize Web Chat” section, where you can upload a logo, input descriptions, and modify settings. You can disable logos if desired and input contact information.
Lead Generation: If you want to generate leads, add a workflow where you prompt users to input their email and name before they start using the chatbot.
Styling Your Chatbot
For customization on appearance:
Choosing a Theme: Select from preset themes (version one or two). Version two offers a more custom interface option.
Custom Styling: If you prefer more control over the style, visit the Botpress style section, customize as needed, and copy the stylesheets.
JavaScript Integration: Get sharable links from the share option in Botpress, which will include URLs ending in .JS.
Adding to Your Website: In your Framer website, create a new component (like “chatbot”), and paste the code. Don't forget to update the URLs based on your generated links.
Final Touches: Drag and drop the chatbot in your desired position on your website, making it visually appealing.
Conclusion
By following these steps, you can successfully implement a personalized chatbot on your website using Botpress without any coding knowledge. If you encounter any issues, feel free to reach out for assistance!
Keyword
- Botpress
- AI Chatbot
- No-code tool
- Customer engagement
- Lead generation
- Web integration
- Customization
- Framer
- Webflow
- WordPress
FAQ
Q: What is Botpress?
A: Botpress is a no-code tool that allows users to create personalized AI chatbots for their websites.
Q: Do I need coding skills to use Botpress?
A: No, Botpress is designed for users without coding knowledge.
Q: How can I generate leads using the chatbot?
A: You can set up workflows in Botpress to prompt users for their email addresses and names before they start interacting with the chatbot.
Q: Can I integrate the chatbot into any website?
A: Yes, Botpress can be integrated with platforms like Framer, Webflow, WordPress, and custom-built websites.
Q: Is Botpress free?
A: Botpress offers a free tier, allowing a limited number of queries. A premium plan is available for those needing more extensive use.