Here's how you can master the Rapid Camera Shutter Effect in Premiere Pro! ? #cinematic #lifeinfocus
People & Blogs

Here's how you can master the Rapid Camera Shutter Effect in Premiere Pro! ? #cinematic #lifeinfocus
Have you ever wondered how to create a rapid camera shutter effect in Adobe Premiere Pro to make your projects look even more dynamic and professional? Follow these steps to add this eye-catching effect using at least 10 images and a few simple techniques.
Step 1: Adding and Setting Up Images
- Add Images to Timeline: Begin by adding at least 10 images to your timeline.
- Set Duration: Select all the images and set their duration to 10 frames.
- Close Gaps: Go to the "Sequence" menu and select "Close Gap" to remove any leftover spaces between the clips.
Step 2: Stagger the Images
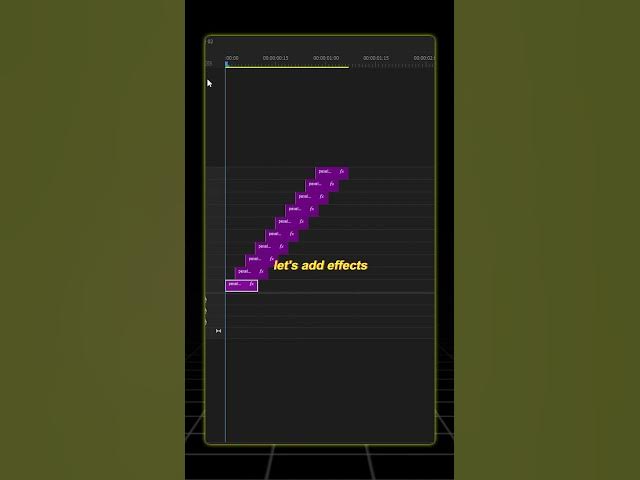
- Move Playhead and Stagger: Move the playhead to the start of the timeline. Advance three frames forward using the right arrow key, then place the second image on the second track.
- Repeat: Repeat this process for all remaining images to create a staggered effect throughout the timeline.
Step 3: Add Effects
- Select and Apply Effects: Select the first image and navigate to the "Effects" panel. Apply the "Directional Blur" and "Transform" effects.
- Set Effect Parameters:
- Direction: Set the direction to 9 degrees.
- Blur Length: Set the blur length to 0.3.
- Animate Effects:
- Move the playhead to the start of the timeline, then move forward three frames.
- Add a position keyframe.
- Move the playhead back three frames and adjust the position until the image goes out of the frame.
- Set the "Shutter Angle" to 100.
- Copy and Paste Effects: Copy and paste the Directional Blur and Transform effects to all images.
Step 4: Final Touches
- Add Sound Effect: Add an appropriate sound effect to enhance the visual effect.
- Review and Adjust: Review your timeline and make minor adjustments if necessary.
Keywords
- Rapid Camera Shutter Effect
- Adobe Premiere Pro
- Timeline
- Images
- Effects
- Directional Blur
- Transform
- Keyframes
- Sound Effect
FAQ
1. What is the rapid camera shutter effect?
This effect mimics the look of a camera's shutter moving rapidly, making your images or video clips appear more dynamic and impactful.
2. How many frames should each image be set to?
Each image should be set to a duration of 10 frames for this effect to work as intended.
3. How do I stagger my images?
Move the playhead to the start of your timeline, advance three frames, and place the second image on the second track. Repeat this for all remaining images.
4. What settings should I use for the Directional Blur?
Set the direction to 9 degrees and the blur length to 0.3.
5. Why do I need to add keyframes?
Keyframes allow you to animate the position of each image, creating the rapid movement effect.
6. Should I add a sound effect?
Yes, adding a sound effect can enhance the visual impact of the rapid shutter effect. Choose a sound that complements the pace and energy of the effect.
By following these steps, you'll be able to add a captivating rapid camera shutter effect to your projects in Adobe Premiere Pro. Happy editing! ?

