

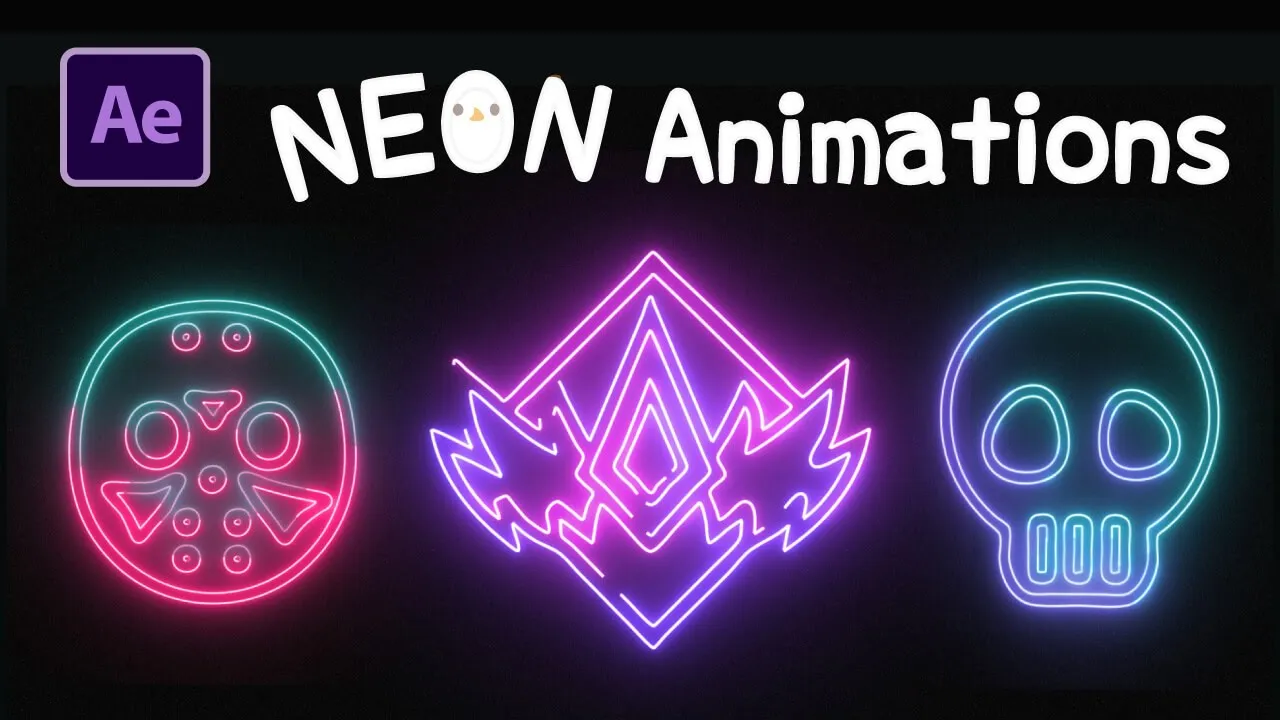
NEON LOGO Animations l After Effects Tutorial l Free plugin
Film & Animation
Introduction
Welcome to this After Effects tutorial where we’ll create an eye-catching animated neon effect perfect for Halloween masks. This technique can also be applied to any shape you’d like. To follow along, you’ll need the Saber plugin. If you don’t have it yet, you can find the download link and tutorial images in the description below.
Step 1: Setting Up Your Project
Create a New Composition:
- Name it "skeleton."
- Set the dimensions to 1990 x 1080 pixels.
- Frame rate: 30 fps.
- Duration: 2 seconds.
- Click "OK."
Import and Pre-compose Your Images:
- Drag your images into the timeline.
- Right-click on the image layer, select "Pre-compose," name it "naon," and ensure "Move all attributes into the new composition" is checked. Click "OK."
Step 2: Trace the Outlines
- Go to the "Layer" menu and select "Auto Trace." Hit “OK” in the settings that pop up.
- Clean up unnecessary keyframes by selecting all created masks and deleting them to maintain a clean timeline.
Step 3: Applying and Customizing Saber
Add the Saber Effect:
- Search for "Saber" in the Effects and Presets window and apply it to the skeleton layer.
Customization Settings:
- In the Saber settings, expand the "Customize Core" section.
- Set "Core Type" to "Layer Mask."
- Adjust the "Split Intensity" down to around 30 for a better appearance.
Adjust Composite Settings:
- Navigate to "Blending Settings" and set "Composite" to "Transparent."
Step 4: Animating the Effect
Animate the Mask Evolution:
- Move to Keyframe 1, select "Mask Evolution," and set a keyframe.
- Change to Keyframe 25 and adjust the "Mask Evolution" to 55.
- Go back to Keyframe 1 and set it to 55 as well.
- For the end of the animation, change the "Mask Evolution" to 1.
Creating Dual Light Spins:
- Duplicate the layer (
Edit -> Duplicate) to make the blue light spin in the opposite direction. - Change the "Mask Evolution" on Keyframe 1 to 180 for the blue light, ensuring both lights remain synchronized.
- Duplicate the layer (
Color Adjustment:
- Change the color of the lights to set them apart visually.
Final Touches:
- If there's an additional layer you don't need, simply uncheck it.
Step 5: Experiment with Styles
Now comes the fun part! Feel free to experiment with different styles such as "Heat" or "Mist" to enhance your animation. Get creative with your designs!
Congratulations! You’ve successfully created a neon logo animation. Watch out for more neon animations that I’ve prepared; they feature different speeds and variations to inspire your creativity.
Thank you for following this tutorial! If you enjoyed it, please like and subscribe to my channel. Your support means a lot! I’ll be back with more tutorials, so I hope to see you again soon!
Keywords
- After Effects
- Neon Animation
- Saber Plugin
- Auto Trace
- Keyframes
- Animation Effects
- Halloween Masks
FAQ
Q: Do I need any special plugins for this tutorial?
A: Yes, you will need the Saber plugin to create the neon effects.
Q: Can I use any shape for this effect?
A: Absolutely! The technique can be applied to various shapes and designs, not just Halloween-related.
Q: Where can I find the Saber plugin?
A: You can find a download link and images in the description below the tutorial video.
Q: What if I want to try different effects?
A: Feel free to experiment with different styles such as "Heat" or "Mist" to achieve the desired look for your animation.
Q: How can I support the channel?
A: If you enjoyed the tutorial, please like and subscribe to the channel for more content related to After Effects and animation.