

Transform AI Images to Laser Engravings with the New Creality Falcon Pro!
Education
Introduction
Hello there! In this video, I will demonstrate a comprehensive process that I’ve never done before: transforming AI-generated images into physical wooden items using the Creality Falcon Pro 10W laser cutter. This is a journey from creating AI art to producing physical products, which you can sell on platforms like Etsy or use as custom items like coasters. Additionally, you'll see how to do this with t-shirts too.
Before diving into the technical details, I'll also review some laser cutters. I own a Creality Falcon 2 laser cutter and the Ender 3 3D printer, both bought with my own money. My wife, Amy, a crafter, suggested reviewing the Falcon Pro 10W as it offers intricate detailing despite its smaller wattage. This model requires assembly, unlike the pre-built Falcon 2.
Creating AI Graphics
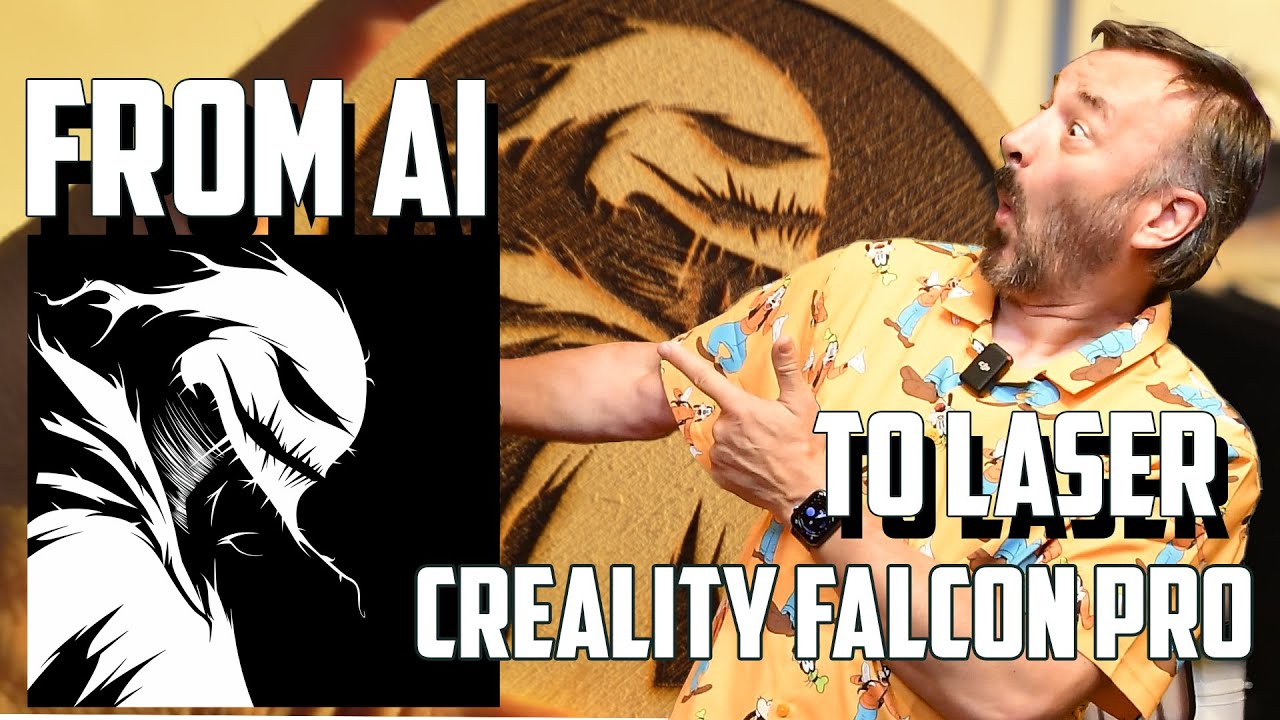
To start, we'll create the graphics. I typically use Midjourney for this, but you can also use other AI generators like Stable Diffusion. The key is to use a proper prompt to create a high-contrast black and white image.
Example Prompts
- Profile: “black figure on white background” or “white figure on black background”
- Details: Avoid gradients to keep the image simple for laser cutting.
After generating your images, it's possible they won't be entirely black and white. Use software like Photoshop or Affinity Photo to adjust the levels. Aim for pure black (0 value) and pure white (255 value).
Saving and Vectorizing the Image
Save the processed images as JPEG or PNG, then open in Adobe Illustrator for vectorization. This ensures your image has clean, sharp lines, which is crucial for laser engraving or printing on t-shirts. If you don't own Illustrator, you can use Adobe Express to convert JPEG to SVG for free.
Using LightBurn Software
Import your vectorized or PNG image into LightBurn software. LightBurn will help you resize the image and adjust settings according to your laser cutter’s specifications.
Layer Settings
- Speed: Adjust this depending on the wattage of your laser.
- Power: Ensure it’s enough to cut through your material without scorching it.
- Order of Operations: Make sure to engrave before cutting to avoid misalignment.
Next, save your image and settings onto a micro SD card if your laser cutter doesn’t support Wi-Fi.
Assembling Creality Falcon Pro 10W
The Falcon Pro 10W comes as a kit requiring assembly. I will guide you through assembling it, ensuring all parts are in place and correctly aligned.
Engraving and Cutting
With the laser cutter ready, insert the SD card and start engraving. Ensure you have protective goggles for safety. The Falcon Pro 10W performs excellently, offering precise, detailed engravings.
Final Product
The final product is a beautifully engraved wooden item, which looks professional and can be used in various creative ways. The ability to take AI art and convert it to a physical item is not just fascinating but also practical for gifting or selling.
Conclusion
I recommend the Creality Falcon laser cutters, especially the Falcon 2, for its ease of use right out of the box. However, if you don’t mind a little assembly and adjustments, the Falcon Pro 10W also offers great value for money.
Stay tuned as I explore more ways to bring AI-generated models into the real world using 3D printing. Thank you for watching, and I hope you enjoyed this journey from AI art to physical product creation.
Keywords
- AI-generated images
- Laser engraving
- Creality Falcon Pro 10W
- Midjourney
- Stable Diffusion
- Photoshop
- Affinity Photo
- Adobe Illustrator
- LightBurn software
- 3D printing
FAQ
What software can I use to create AI-generated images?
You can use tools like Midjourney or Stable Diffusion.
How do I prepare the image for laser engraving?
Use programs like Photoshop or Affinity Photo to adjust the contrast, ensuring pure black and white levels.
Do I need to vectorize the image?
Yes, vectorizing your image ensures clean, sharp lines, essential for laser engraving or printing.
Which laser cutter should I use, and why?
I recommend the Creality Falcon 2 for its user-friendly setup and reliability. The Falcon Pro 10W is also good but requires assembly and more initial adjustments.
Can I use this process to create other items?
Absolutely! Besides wooden items, you can apply this to t-shirts, customized gifts, or even combine with 3D printing projects.